Introduction
Microcontrollers can sense properties of the physical world using digital and analog sensors, but a single sensor reading by itself doesn’t really tell you much. In addition, sensors can be noisy and erratic devices, sensitive to environmental disturbances that you may not want in your project (e.g. a heart rate sensor that is sensitive to the movements of the wearer). These notes provide information and guidance on how to analyze changes in sensor readings in order to detect when something significant has occurred and how to filter sensor readings in order to make their behavior more stable.
Sensor Analysis
There are many ways of analyzing sensor data. The most fundamental kind is detecting sensor change events. That is what we will be discussing here. There are times you may want to detect specific sensor change events. After determining what your sensor’s changes look like over time (by using the Serial Plotter in the Arduino IDE Tools menu or a graphing program like the one shown in the Serial Output from Arduino to Processing lab), you can begin trying to detect these specific sensor change events.
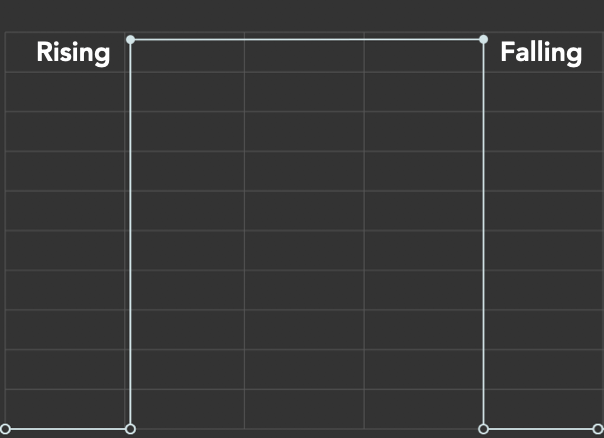
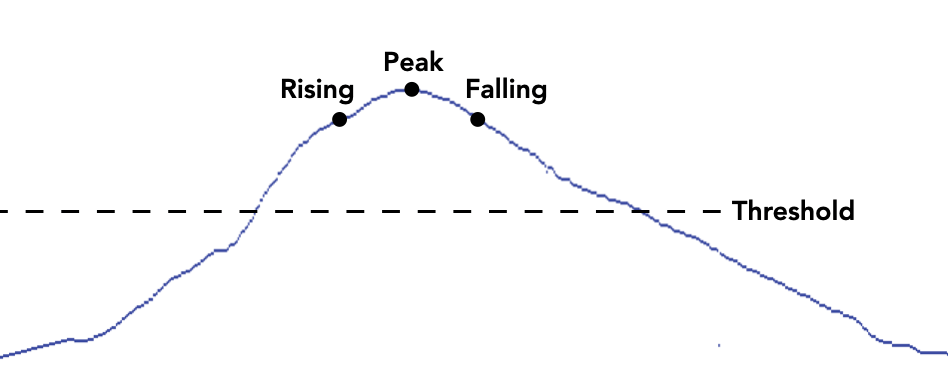
Sensor changes are described in terms of the change in the sensor’s property, often a voltage output, over time. For a digital sensor the most important states to consider for sensor change are the rising and falling edges. For an analog sensor we consider rising and falling edges and also the peak value (usually above some predetermined threshold). The figures below of sensor voltage over time illustrate these conditions.
Count Button Presses
One of the many things you can do with digital sensors/buttons is to count the number of state changes, for example button presses. In the example code below each time the button changes state from off to on, you know it’s been pressed once. By adding another global variable and incrementing it when you detect the button press, you can count the number of button presses.
The code can also be found here.
/*
Button
Carlos Castellanos | 2019 | ccastellanos.com

count how many times a button is pressed

Schematic, see:
http://www.arduino.cc/en/Tutorial/Button

*/

// constants won't change. They're used here to set pin numbers (faster/saves memory):
const int buttonPin = 2;      // pins for button and LED

// store button's status - initialize to OFF
// (this variable will change, so it's not a const)
int buttonState = 0;
int prevButtonState = 0;
int pressCount = 0;

void setup() {
  Serial.begin(9600);
  pinMode(buttonPin, INPUT);    // set button to input
}

void loop() {

  // read the state of the button into our variable
  buttonState = digitalRead(buttonPin);

  // check if the current button state is different than the previous state
  if (buttonState != prevButtonState) {
    if(buttonState == HIGH) {
      Serial.print(F("Button has been pressed "));
      Serial.print(++pressCount); // increment the counter
      Serial.println(F(" times."));
    }
  }

  prevButtonState = buttonState; // save the previous button state
}
Analog Threshold Detection
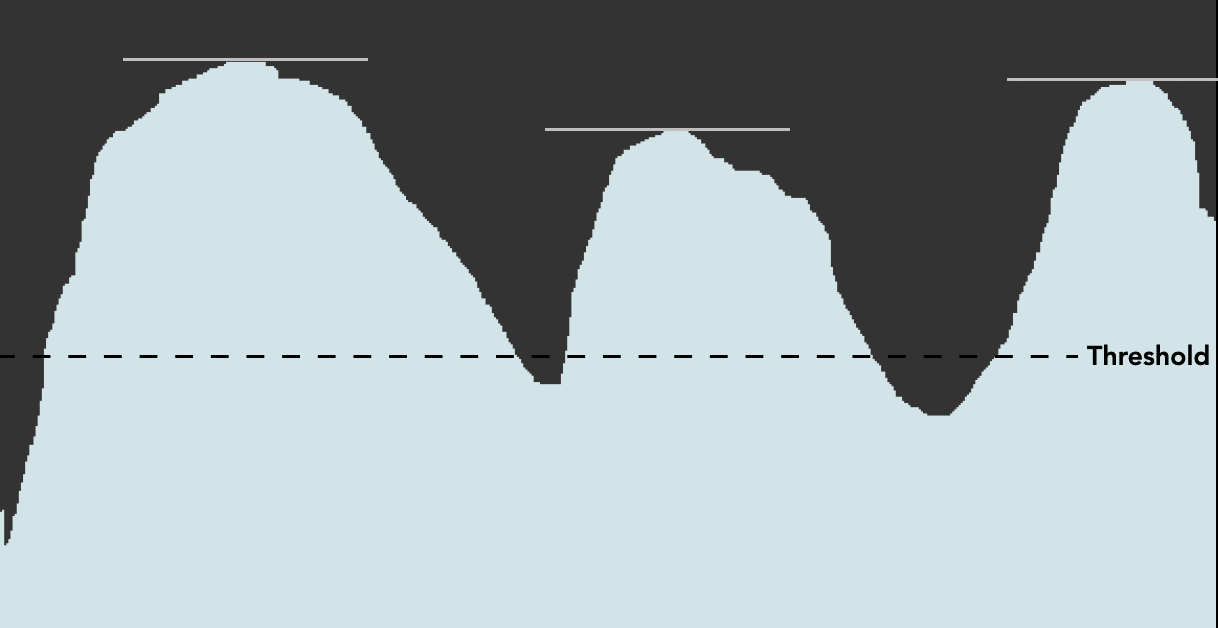
The simplest form of analog state change detection is to look for when the sensor rises above a given threshold in order to take action. However, if you want the action be triggered only once (i.e. when it first rises above the threshold, not every instance thereafter when it remains above), you need to keep track of both its current state and previous state.
Below is Arduino sample code for detecting thresholds in an analog signal. You can also find the code here.
int prevSensorVal = 0;   // sensor's previous value
int threshold = 500;     // arbitrary threshold

void setup() {
  Serial.begin(9600);
}

void loop() {
  // read the sensor:
  int sensorVal = analogRead(A0);

  // if it's above the threshold:
  if (sensorVal >= threshold) {
    // check that the previous value was below the threshold:
     if (prevSensorVal < threshold) {
        // the sensor just crossed the threshold
        Serial.println("Sensor crossed the threshold!");
     }
  }
  // save value for next comparison:
  prevSensorVal = sensorVal;
}
This code will give you an alert only when the sensor value crosses the threshold when it is rising. You won’t get any reading when it crosses the threshold when it is falling, and you will only get one message when it crosses the threshold. It is possible to sense a threshold crossing when the sensor is falling, by reversing the greater than and less than signs in the example above. The threshold you set depends on your application. For example, if you’re using a light sensor to detect when it’s dark enough to turn on artificial lighting, you’d use the example above, and turn on the light when the threshold crossing happens. But you might also need to check for the falling threshold crossing to turn off the light.
Analog Peak Detection
To detect when an analog sensor reaches its highest value in a given time period (sometimes called envelope following or envelope detecting), you first set an initial peak value at zero. Pick a threshold below which you don’t care about peak values. Any time the sensor value rises above the peak value, you set the peak value equal to that sensor value. When the sensor value starts to fall, the peak will remain with the highest value.
This means that you only really know you have a peak when you’ve passed it. When the current sensor value is less than the previous reading you saved as the peak value, you know that previous value was a peak. When the sensor value falls below your threshold value after you have a peak, but your peak value is above that threshold, then you know you have a peak value. After you do something with that peak value, you need to reset the variable to 0 to detect other peaks.
Below is Arduino sample code for detecting peaks in an analog signal. You can also find the code on the code here.
int peakVal = 0;
const int threshold = 50;
const int noise = 5;

void setup() {
  Serial.begin(9600);
}

void loop() {
  //read sensor
  int sensorVal = analogRead(A0);

  // check if it's higher than the current peak:
  if (sensorVal > peakVal) {
    peakVal = sensorVal;
  }
  if (sensorVal <= threshold - noise) {
    if (peakVal > threshold + noise) {
      // you have a peak value:
      Serial.println(peakVal);
      // reset the peak variable:
      peakVal = 0;
    }
  }
}
Sensor Filtering (Smoothing)
Dealing With Noise
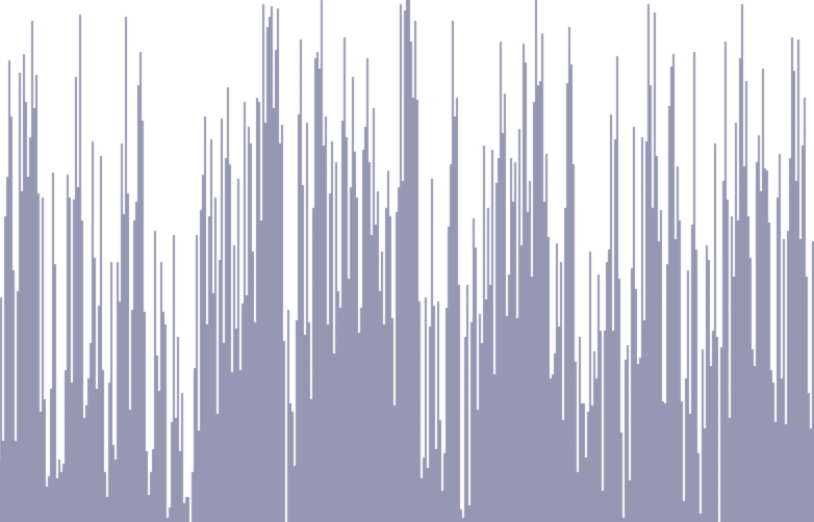
Sometimes you get noise from sensor readings that can interfere with peak readings. Instead of a simple curve, you get a jagged rising edge filled with many local peaks:
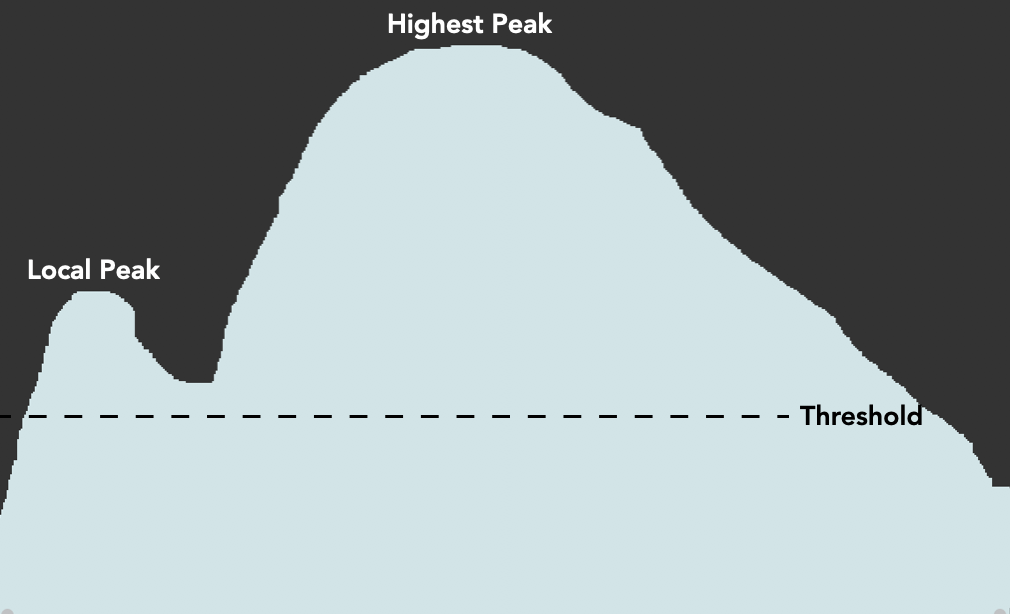
A simple way to deal with this is by adding in a noise variable and checking to see if the sensor’s change is different than the previous reading and the noise combined. This can smooth out the noise and remove some of these local peaks.
int peakValue = 0;
int threshold = 50;   //set your own value based on your sensors
int noise = 5;        //set a noise value based on your particular sensor

void setup() {
  Serial.begin(9600);
}

void loop() {
  //read sensor on pin A0:
  int sensorValue = analogRead(A0);
  // check if it's higher than the current peak:
  if (sensorValue > peakValue) {
    peakValue = sensorValue;
  }
  if (sensorValue <= threshold - noise ) {
    if (peakValue > threshold + noise) {
      // you have a peak value:
      Serial.println(peakValue);
      // reset the peak value:
      peakValue = 0;
    }
  }
}
Running Average Filter
A better way to deal with noise and erratic sensor readings is by using smoothing filters. The simplest smoothing filter is a simple running average. This is achieved simply by obtaining the mean (average) of the last x sensor readings. So if x=5 and you have the following sensor readings:
[299, 356, 322, 401, 334]
You simply add them up and divide by 5:
(299+356+322+401+334) / 5
1712 / 5 = 342.4
Median Filter
Sometimes you may want to remove random, anomalous or extraneous readings. For this you would use a median filter. S if you last x sensor readings are (with x=5):
[124, 126, 122, 698, 123]
You place the numbers in value order: 122, 123, 124, 126, 698
The median of these 5 readings would then be 124. The anomalous value (698, in red) would be ignored.
Weighted Average (Low-pass) Filter
An even better way to deal with noise and erratic sensor readings is by using a weighted average or low-pass filter. Below are two graphs comparing “raw” sensor readings with readings smoothed with a weighted average filter.
“raw” sensor value 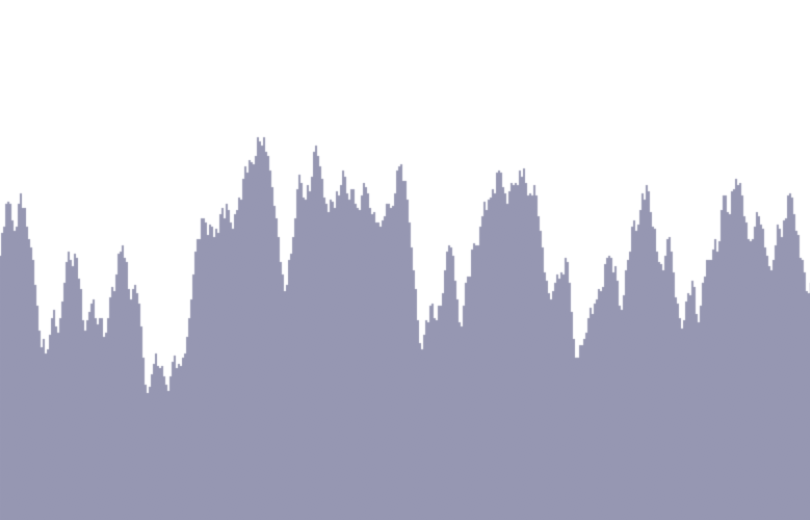
low-pass filtered sensor value
Below are two formulas and Arduino code for a simple weighted average filter:
filteredValue = previousFilteredValue + weight * (rawValue – previousFilteredValue)
filteredValue = weight * rawValue + (1-weight) * previousFilteredValue
weight is floating point 0.0 – 1.0
The weight variable indicates how important or reliable the new raw value is. If it’s 100% reliable, weight = 1, and no filtering is done. If it’s totally unreliable, weight = 0 and the raw result is filtered out.
/*
  Analog smoothing using a weighted average (low-pass) filter

  Based upon code by Tom Igoe


 This program reads an analog input and smoothes out the result using a
 weighted average filter. It works by taking a weighted average of the
 current reading and the average of the previous readings.

 Here is the the formula:
 filteredValue = weight * rawValue + (1-weight) * previousFilteredValue

 The variable weight is a value between 0 and 1 that indicates
 how important or reliable the new raw value is.
 If it’s 100% reliable, weight = 1, and no filtering is done.
 If it’s totally unreliable, weight = 0  and the raw result is filtered out.


 In this example, a second analog reading, (e.g. a potentiometer) is used
 to set the weight. When this sensor is set high, the average is weighted
 in favor of the current reading, and almost no smoothing is done.
 When the value is low, the average is weighted in favor of the previous reading(s)
 and the current reading affects the average very little.

 n.b. the variable "prevEstimate" needs to be a global, since it's modified
 each time a new filtering is done.  So if you want to use this for multiple
 inouts, you'll need a "prevEstimate" variable for each input.

 November 7 2019

 */
const int sensorPin = A0;
const int weightPin = A1;
float prevEstimate = 0;      // previous result

void setup() {
  Serial.begin(9600);
}

void loop() {
  // read the sensor:
  int sensorVal = analogRead(sensorPin);
  // convert to voltage: (not required, can just use sensorVal as the raw value)
  float voltage = 5.0 * sensorVal / 1023.0;
  // read the trim pot:
  float weightVal = analogRead(weightPin)/1023.0;

  // filter the sensor's result:
  float currEstimate = filter(voltage, weightVal, prevEstimate);
  // print the result:
  Serial.println(currEstimate);
  // save the current result for future use:
  prevEstimate = currEstimate;
}

// filter the current result using a weighted average filter:
float filter(float rawValue, float weight, float prevValue) {
  // run the filter:
  float result = weight * rawValue + (1.0 - weight) * prevValue;
  // return the result:
  return result;
}
Resistor-Capacitor (RC) Circuit
If you want to smooth your sensor readings you don’t actually need to write any code. You can create a low-pass filter by wiring up a resistor-capacitor (RC) circuit. The circuit below takes a simple voltage divider (using a photocell) and adds a 1K resistor, followed by a 470uF capacitor going to ground. This slows down and smooths out the changes in the sensor readings.

Conclusion
Armed with these simple methods for analyzing and filtering your sensor data you can create interesting and meaningful relationships between your sensors’ behaviors and the mapping to media outputs. Consider using Processing or another language to trigger media events (e.g. change color, manipulating sound parameters, etc) based some property of the signal (e.g. number of peaks). You may also want to consider changing media events/behaviors based upon whether a signal is rising or falling. The possibilities are almost endless.