Introduction
Microcontrollers will be at the heart of most of your projects and at the center of the work in this course. But what exactly is a microcontroller? Well at its most basic, it is a computer. But there are different kinds of computers for different purposes. The computer at the heart of your laptop is optimized for different purposes than the one in your mobile phone or the one in your microwave oven. A microcontroller is typically a single integrated unit that usually includes a microprocessor, program memory, input-output (I/O), and analog to digital converters (ADCs). Some microcontroller systems (like the Arduino) also include timers, counters and Pulse Width Modulated (PWM) outputs. Microcontrollers are often designed to take input from the physical world and control output devices in the physical world.
Microcontollers can be found in household appliances, industrial equipment and desktop computers. In fact most electronic devices you use today have a microcontroller at their core. Microcontrollers are optimized for control of general input and output. They’re generally less computationally capable than the processors used in desktop/laptop computers or servers, for example. They require less power than those other processors, and they’re easier to interface with the physical world through input circuits called sensors and output circuits called actuators. They can communicate with other processors through various communication interfaces.
Microcontroller Basics
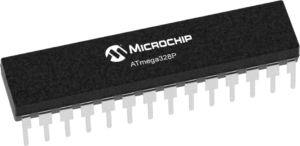
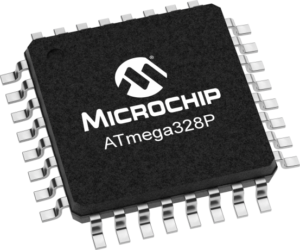
Any microcontroller board (e.g. the Arduino Uno) has at its core the micrcontroller chip. This is an IC (integrated circuit) that everything else on the board is built around and interfaced with. Arduino micrcocontrollers typically use Atmel (now Microchip) chips. The ATMega328P for example is at the heart of many Arduino boards like the Uno and (the now retired) Mini. These chips come in different packages such as SMD (surface mount device) or PDIP (plastic dual inline package – two parallel rows of electrical connecting pins)
Below is a pin digram of the ATmega328P with its pins labelled. You can see which ones are general purpose input and output (GPIO), which ones are for power and communications, and which ones have specialty functions as well, the most common of which is analog input.
There are several different types of microcontrollers. The simplest have very little program memory, only one or two GPIO (general purpose input/output) pins and no specialty functions. These might only cost a fraction of a dollar a piece, in large quantities. Slightly more capable ones will have more memory, more GPIO pins and will include specialty functions as well. The Atmega328P processor that is at the heart of the Arduino Uno is one of these processors. These are simple 8-bit micrcontrollers that you can buy for a few dollars a piece in quantity. More powerful than those are 32-bit microcontrollers such as the Arm® Cortex®-M0 32-bit SAMD21 microcontroller in some newer Arduinos (like the Nano 33 IoT).
Microcontroller Development Boards
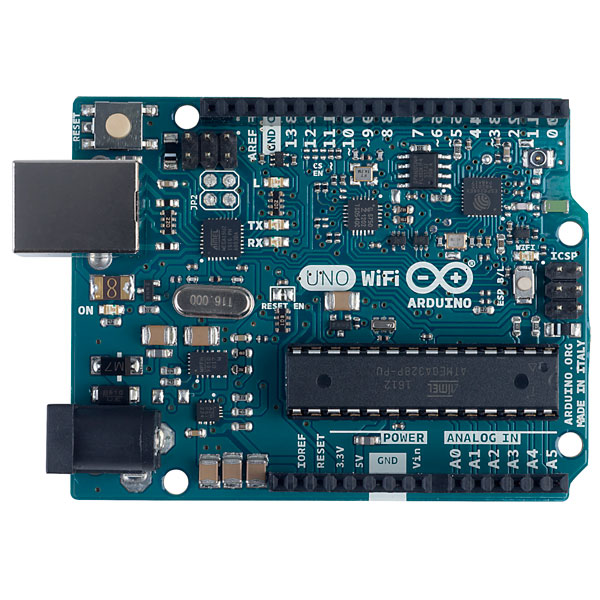
Often when we use the term “micrcontroller” what we really mean is a micrcontroller development board. This is roughly equivalent to a motherboard on desktop/laptop computer. The Arduino family of boards for example, can all be considered microcontroller development boards. A processor, whether microcontroller or processor in your laptop/desktop, can’t operate alone. It needs support components. For a microcontoller, you need at least a voltage regulator and usually an external clock called a crystal. You might also add circuitry to protect it in case it is powered wrong, or in case the wrong voltage and current are plugged into the IO pins. You might also include communications interfaces, ADCs and even a wifi chip. This extra circuitry determines the base cost of a development board like the Arduino.
Development boards also allow you to program the controller’s firmware and software. You can buy and program microcontrollers without a development board, but you will need some extras to do so. First, you will need to design your own support circuitry, at least a programmer interface and a power supply. You will need a hardware programmer as well. Refer to the links at the end for more information on this.
The two most common languages for microcontrollers are the assembly language of each particular processor, or the C programming language. A toolchain is the combination of compilers and linkers needed to convert the instructions you write into a binary file that the microcontroller can interpret as its instructions and the programmer software needed to upload that into the processor. Every manufacturer and processor family has its own assembly language (the beginning of the toolchain), but there’s a C compiler for almost every microcontroller on the market. Beyond that, a toolchain might include a compiler or firmware to convert a higher level language into the controller’s assembly language.
A toolchain does the work of converting your code, but an integrated development environment (IDE) is needed to connect you, the programmer, to the toolchain. An IDE usually contains a text editor with user interface elements to send your text to the toolchain and upload the result to the processor. IDEs will also include a display to give you error messages about your code, and a monitor of some sort so that you can see what your code does when it’s running on the processor.
Conclusion
For the hobbyist, student, artist and hacker, micrcontroller development boards are usually the best options to get started in the world of electronics and physical computing. With one board and a few components, you can typically get started for under $100 USD. Starter kits are a good investment if you’ve never done this before, as they get you familiar with the basics.
Using the microcontroller chips by themselves, on the other hand, is more of a hassle up front. You have to know how to build the basic support and communications circuits, how to use a hardware programmer, and how to set up a toolchain. You’ll spend a lot of time early on cursing and wishing you had bought a development board. The advantage comes a bit later on, once everything is set up. You will eventually save money on development boards and can make them in any shape you want. It gets better the longer you continue making microcontroller projects. So start with a development boards, and move up as your needs demand and knowledge can accommodate.