What You Will Need to Know
To get the most out of this lab, you should be familiar with how to program an Arduino, and with the basics of serial communication. If you’re not, review the links below:
Arduino Programming Basics
Arduino Analog Input
Serial Output from Arduino to Processing
Items You Will Need
You will need the hardware listed below. For the analog sensors, you can use photocells, potentiometers or any sensor that will give you analog signals.

Arduino microcontroller 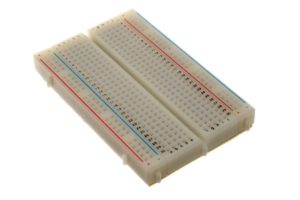
Breadboard 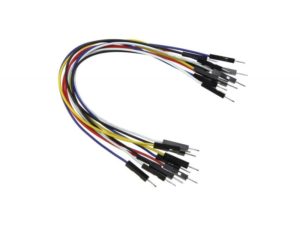
Jumper wires 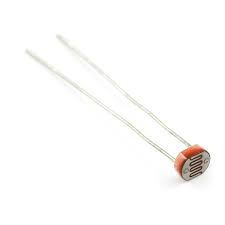
Photocell (x2) 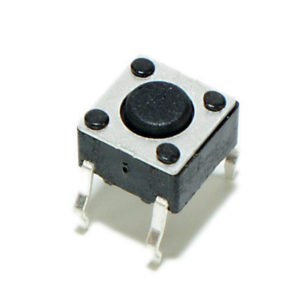
Momentary pushbutton switch 
10K resistor (x3)
The breadboard, schematics and Arduino sketches for this lab activity are in the course code repository on Github, in this folder.
The Processing sketches for this lab activity are in the course code repository on Github, in this folder.
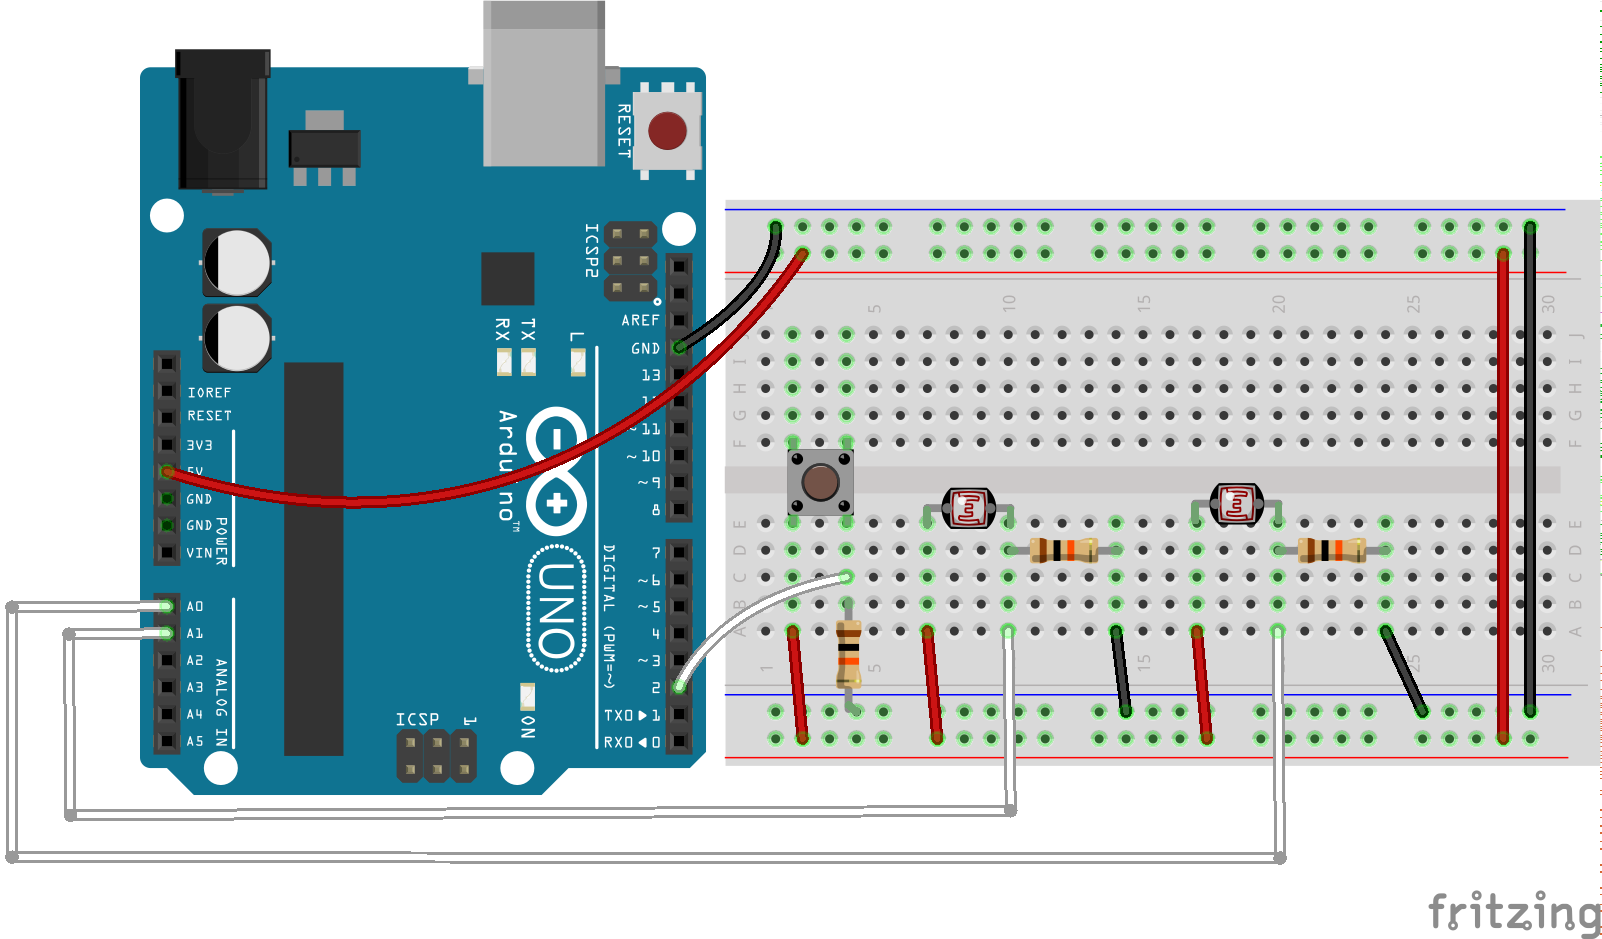
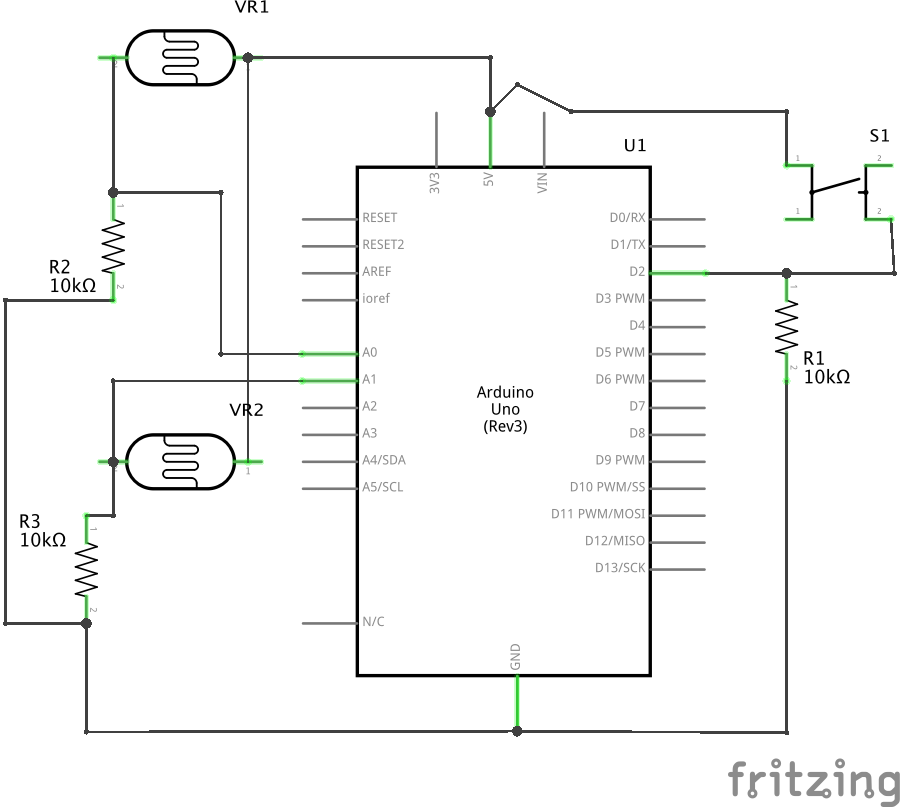
Connect the Sensors
Build the circuit below.
Sending Values for Multiple Sensors
In the previous serial lab, you sent data representing one sensor’s value, over and over. When sending multiple sensor values, things get a little more complicated. You must devise a way to know which value represents which sensor. For example, if you used the following loop to send your sensor values:
void loop() {
   for (int thisSensor = 0; thisSensor < 3; thisSensor++) {
      int sensorValue = analogRead(thisSensor);
      Serial.print(sensorValue);
      Serial.print(",");
   }
}
Your output would look something like this:
342,345,406,334,337,407,398
There is no way to determine which value corresponds to which sensor (the numbers just keep printing to the right without a a newline). We need to get the sensor values in order. Essentially, this entails coming up with your own protocol of sorts. Some kind of format that both the sender and receiver agree upon ahead of time.You can accomplish in two basic ways: you can use punctuation or you can use handshaking (aka “call and response”).
Punctuation
One way to send the data such that it can be interpreted clearly is to punctuate each set of data uniquely. Just as a sentence ends with a period, you can end your data with a carriage return and a newline. Using the two photocells and the button you wired up, we will send the data in sets of three — separated by a comma and ending ina new line & carriage return. Here is some code that will read the state of all three and send them out the serial port, properly formatted. Upload to your Arduino and observe.
const int btnPin = 2; // digital input

void setup() {
  // start serial port at 9600 bps
  Serial.begin(9600);
  // configure the digital input
  pinMode(btnPin, INPUT);
}

void loop() {
  // read the analog sensor
  int sensorVal = analogRead(A0);
  // print the results
  Serial.print(sensorValue);
  Serial.print(",");

  // read the analog sensor
  sensorVal = analogRead(A1);
  // print the results
  Serial.print(sensorValue);
  Serial.print(",");

  // read the button state
  sensorValue = digitalRead(btnPin);
  // print the results:
  Serial.println(sensorValue);
}
This code can also be found here.
Now each grouping of three readings is separated by a newline, so whenever you get a newline, you know that the next value is the first sensor. Meanwhile each individual sensor reading is separated by a comma.
Receive the Data in Processing
Now we must write a Processing sketch that reads and parses the data sent by the Arduino program above. The code is similar to the program from the previous serial lab (SensorGraphASCII), but instead of one sensor we have to parse out three and use that data not to build a graph but to control the position and color of a shape on the screen. Run this code in Processing and observe.
/*
 * AnalogSensorsButton
 *
 * Carlos Castellanos
 * August 5, 2020
 *
 * Example of serial communication between Processing & Arduino using the
 * "punctuation" method
 * Arduino sends the data for three sensors as ASCII and Processing
 * uses that data not to control the position and color of a shape on the screen.
 *
 *
 */


import processing.serial.*; // import the Processing serial library

Serial myPort;              // The serial port

float fgcolor = 0;          // Fill color defaults to black
float xpos, ypos;           // Starting position of the ball

void setup() {
  size(800, 600);

  // List all the available serial ports
  println(Serial.list());

  // Change the number in the Serial.list() array to the appropriate
  // number of the serial port that your microcontroller is attached to.
  String portName = Serial.list()[1];
  myPort = new Serial(this, portName, 9600);

  // don't generate a serialEvent() until you get an ASCII newline character
  myPort.bufferUntil('\n');
}

void draw() {
  background(#2b9468); // green background
  fill(fgcolor);

  // Draw the shape
  ellipse(xpos, ypos, 40, 40);

}

void serialEvent(Serial myPort) {
  // read the serial buffer:
  String myString = myPort.readStringUntil('\n');
  if (myString != null) {
    myString = trim(myString); // remove whitespace chars (e.g. '\n')
    // split the string at the commas
    // and convert the sections into integers
    int sensors[] = int(split(myString, ','));
    // now print out those three integers using a for() loop, like so
    for(int i=0; i<sensors.length; i++) {
      print("Sensor " + i + ": " + sensors[i] + "\t");
    }
    // add a linefeed at the end
    println();

    // assign the sensor values to xpos & ypos
    if (sensors.length > 1) {
      xpos = sensors[0];
      ypos = sensors[1];
      // the button will send 0 or 1.
      // this converts them to 0 or 255 (black or white)
      fgcolor = sensors[2] * 255;
    }
  }
}
This code can also be found here.
The parsing happens in the serialEvent() method. The Serial.println() in Arduino attaches a newline and a carriage return. Newlines, carriage returns, spaces, and tabs are all considered whitespace. So we use the trim() method to remove it. We then split the string into three separate strings at the commas using the split() method, making sure to cast them as integers. We then assign the first two values (the analog sensors) to the x and y positions of the ellipse and the third value (the button state) will toggle the ellipse between black and white.
Handshaking
Punctuation helps keep your data in order, but because asynchronous serial communication is asynchronous, you can run into a problem when the sender sends faster than the receiver can read. When this happens, the receiver program slows down as the serial buffer fills up. You can manage this by implementing some form of flow control. The simplest way do to this is by using handshaking (aka call-and-response). With this method, the sending program only sends when it is requested by the receiving program, while the receiving program has to request new data every time it finishes reading/processing what it has.
We can convert the punctuation method above to a handshaking method fairly simply. First, we modify the Arduino code by adding a new method at the end of the sketch called establishContact(). This method continuously sends out a message on startup until it gets a byte of data from Processing. Then, we modify the loop() function by adding an if() statement to look for incoming serial data and read it. The rest of the Arduino sketch remains the same.
const int btnPin = 2; // digital input

void setup() {
  // start serial port at 9600 bps
  Serial.begin(9600);
  // configure the digital input
  pinMode(btnPin, INPUT);

  establishContact();  // send data establish contact until receiver responds
}

void loop() {
  // if we get a valid byte, read the sensors
  if (Serial.available() > 0) {
    // read the incoming byte
    int inByte = Serial.read();

    // read the analog sensor
    int sensorVal = analogRead(A0);
    // print the results
    Serial.print(sensorVal);
    Serial.print(",");

    // read the analog sensor
    sensorVal = analogRead(A1);
    // print the results
    Serial.print(sensorVal);
    Serial.print(",");

    // read the button state
    sensorVal = digitalRead(btnPin);
    // print the results:
    Serial.println(sensorVal);
  }
}

void establishContact() {
  while (Serial.available() <= 0) {
    Serial.println("0,0,0");   // send an initial string
    delay(300);
  }
}
This code can also be found here.
When you run this code and open the Serial Monitor, you will see:
0,0,0
0,0,0
0,0,0
0,0,0
Next, we will modify the Processing sketch to look for this message and send a response. Here, we add a new global variable called contact and modify the serialEvent()method to look for the “0,0,0” message from the microcontroller. When it gets the initial message, it will send out a byte to request data. From then on, it will read in the string, parse it, and send a byte to request more data when it’s done.
/*
 * AnalogSensorsButton_Handshaking
 *
 * Carlos Castellanos
 * August 5, 2020
 *
 * Example of serial communication between Processing & Arduino using the
 * "call-and-response" (handshaking) method
 * Arduino sends the data for three sensors as ASCII and Processing
 * uses that data not to control the position and color of a shape on the screen.
 *
 *
 */


import processing.serial.*; // import the Processing serial library

Serial myPort;              // The serial port

float fgcolor = 0;          // Fill color defaults to black
float xpos, ypos;           // Starting position of the ball

boolean contact = false;    // Whether you've heard from the microcontroller

void setup() {
  size(800, 600);

  // List all the available serial ports
  println(Serial.list());

  // Change the number in the Serial.list() array to the appropriate number
  // of the serial port that your microcontroller is attached to.
  String portName = Serial.list()[1];
  myPort = new Serial(this, portName, 9600);

  // don't generate a serialEvent() until you get an ASCII newline character
  myPort.bufferUntil('\n');
}

void draw() {
  background(#2b9468); // green background
  fill(fgcolor);

  // Draw the shape
  ellipse(xpos, ypos, 40, 40);

}

void serialEvent(Serial myPort) {
  // read the serial buffer:
  String myString = myPort.readStringUntil('\n');
  if (myString != null) {
    myString = trim(myString); // remove whitespace chars (e.g. '\n')

    // wait & listen until you hear from the microncontroller
    if(contact==false) {
      if(myString.equals("0,0,0")) {
        myPort.clear(); // clear the serial buffer
        contact = true;
        myPort.write(65); // send back a byte (doesn't matter what) to ask for more data
      }
    } else {  // if you have heard from the microcontroller, proceed
      // split the string at the commas
      // and convert the sections into integers
      int sensors[] = int(split(myString, ','));
      // now print out those three integers using a for() loop, like so
      for(int i=0; i<sensors.length; i++) {
        print("Sensor " + i + ": " + sensors[i] + "\t");
      }
      // add a linefeed at the end
      println();

      // assign the sensor values to xpos & ypos
      if (sensors.length > 1) {
        xpos = sensors[0];
        ypos = sensors[1];
        // the button will send 0 or 1.
        // this converts them to 0 or 255 (black or white)
        fgcolor = sensors[2] * 255;
      }
    }
    // when you've parsed the data you have, ask for more
    myPort.write(65);
  }
}
This code can also be found here.
Be Creative
The device you just created contains the same basic functionality of a mouse: two analog sensors that affect X/Y position, and a button. Can you create another physical interface with similar functionality but different interface? A video editor that scrubs forward and back when you tilt a wand? Breathing to generate images and/or text? A flashlight-based musical player? Try to brainstorm a bunch of these, then create a prototype in Arduino and Processing, or whatever programming environment you choose. Come up with a physical interface that clearly maps physical actions to computational media. Figure out which actions can and should be possible at the same time. This is not a requirement of this lab but a suggestion that you can use for your projects.