Introduction
The sense of touch is a fundamental form of non-visual perception for humans. Although it is often overshadowed by vision, touch nevertheless plays a crucial role in nearly all of our sensory experiences (as JJ Gibson has noted). Like all senses, the sense of touch allows us to gather information about our environment. In this lab, we will look at several touch and tactile-based sensors. As with any type of sensor, touch sensors require that the physical process or act of touch be transduced into electrical form and then converted to a digital number in some way. There are many different ways to build circuits that can function as touch sensors. There are two basic types of touch sensors: resistance-based and capacitance-based. We will go over a few examples of each here but you are encouraged to do your own research to find more (you can start with the Further Reading section at the bottom of this page).
What You Will Need to Know
To get the most out of this lab, you should be familiar with the following concepts beforehand. If you’re not, review the links below:
Items You Will Need
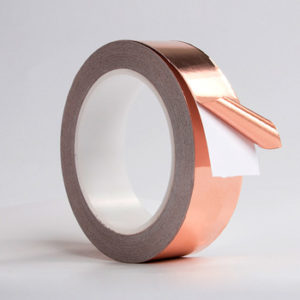
Copper foil tape can be purchased at Adafruit, Sparkfun, craft stores, Walmart or Amazon. Aluminum foil (the same kind you purchase at the supermarket) will also work. Other household items that are conductive such as graphite pencils, metallic paper clips, modeling clay (i.e. Play-doh), food (especially fruits) and water are also recommend for experimentation.
Resistive Touch
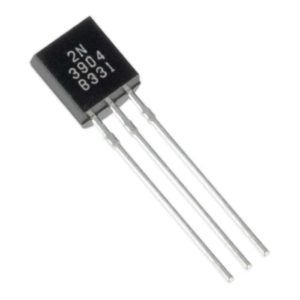
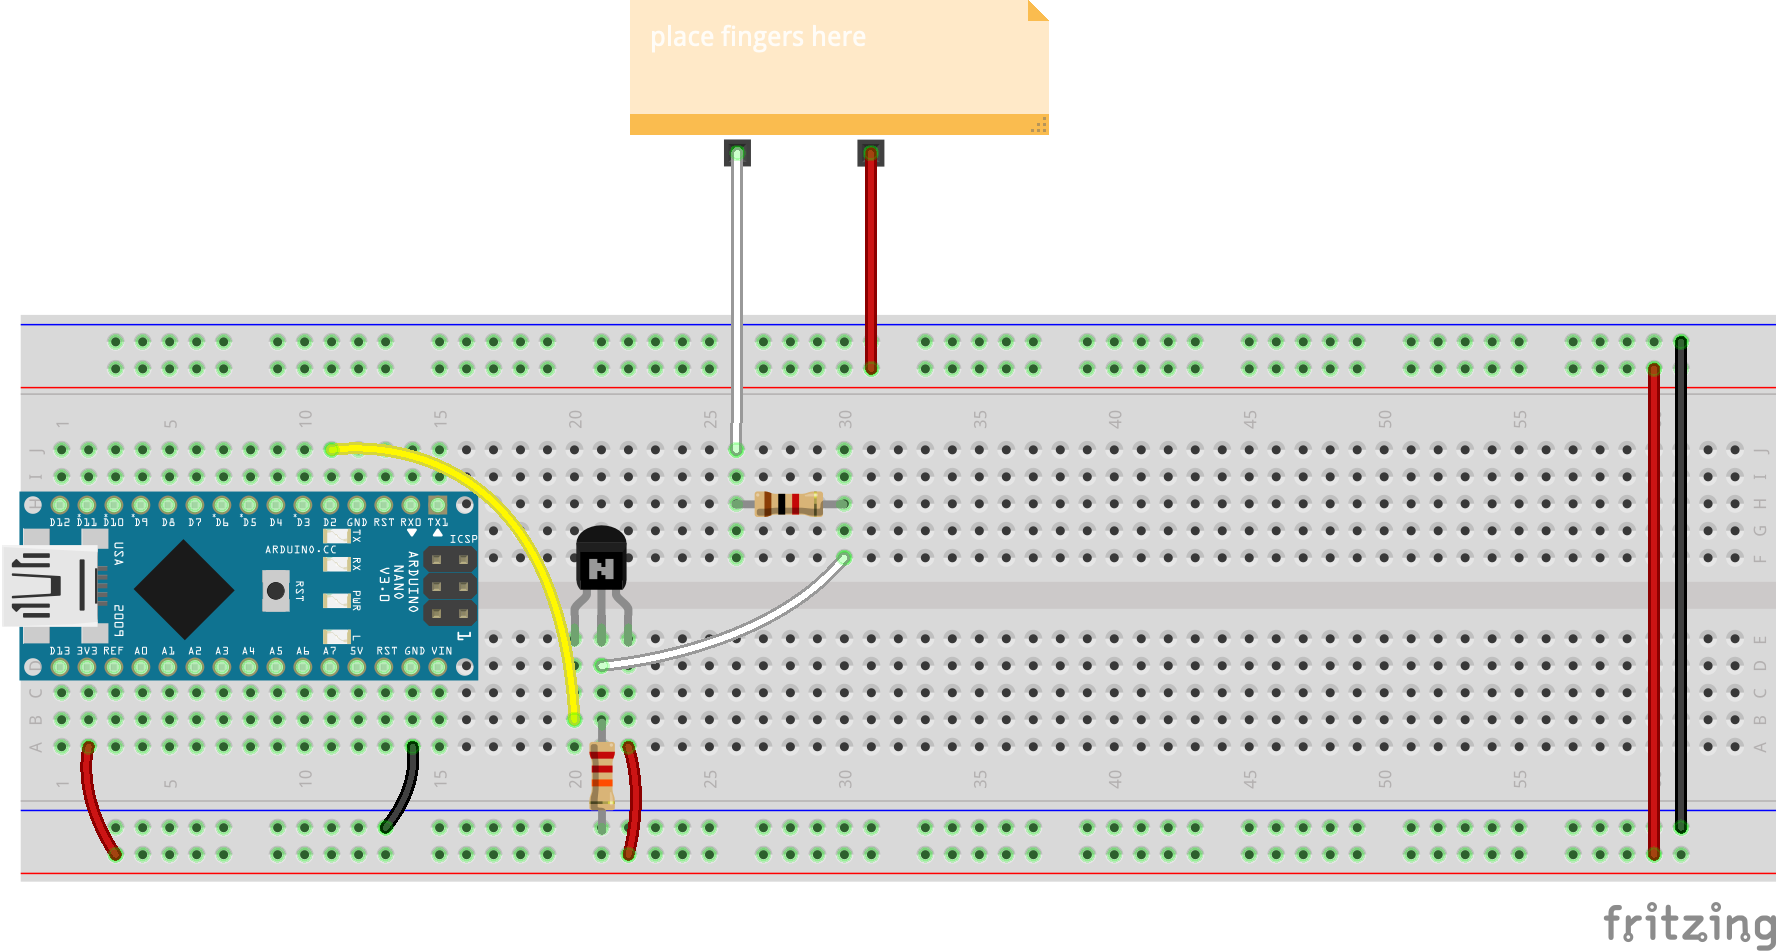
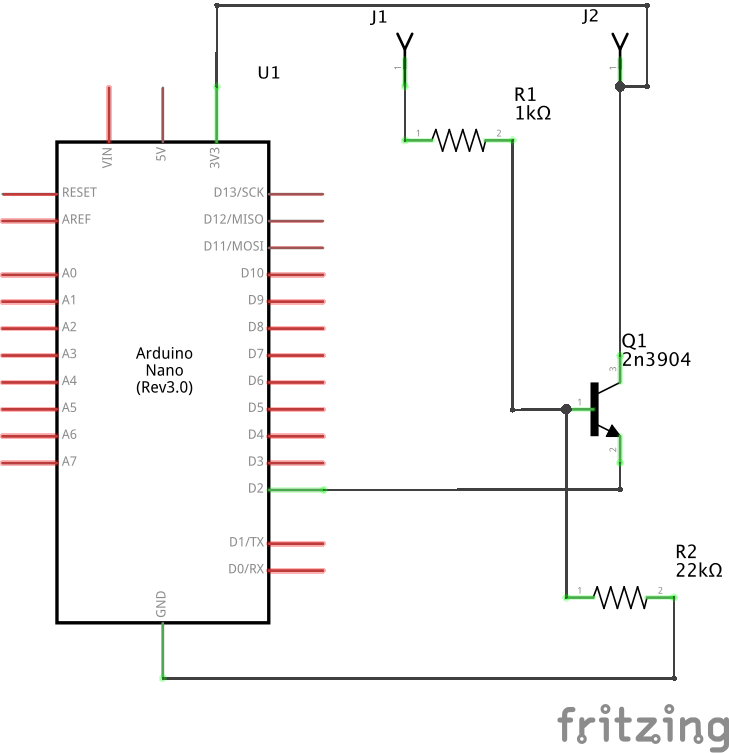
Resistive touch switches are based on the fact that human tissues (like the skin), are conductive. The circuit below is perhaps the simplest touch sensor. You basically have a bipolar transistor used as a switch, along with a a couple of resistors. Resistor R1 protects the transistor from too much current in case the electrodes are short-circuited (e.g. make direct contact) and in case of random static electrical spikes. Resistor R2 is a pull-down resistor. It runs the base to ground when no electrode is touched (so it does not float). If one of the electrodes is touched, nothing will happen. But if both electrodes are touched together (i.e. place a finger on both of them), then a small amount of current will flow through the skin to the base of the transistor. The transistor will then go from cut-off to “saturation” (when current freely flows from collector to emitter), and current will flow from the collector to emitter region and then to the Arduino.
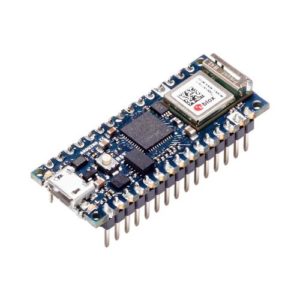
Go ahead and build this circuit. You can upload the code from File>>Examples>>Digital>>Button to your Arduino. When ready, simply place a finger between the two wires to complete the circuit (thus closing the switch). You should see the built-in LED light up. You can attach conductive tape to the contact wires to increase the conductive area.
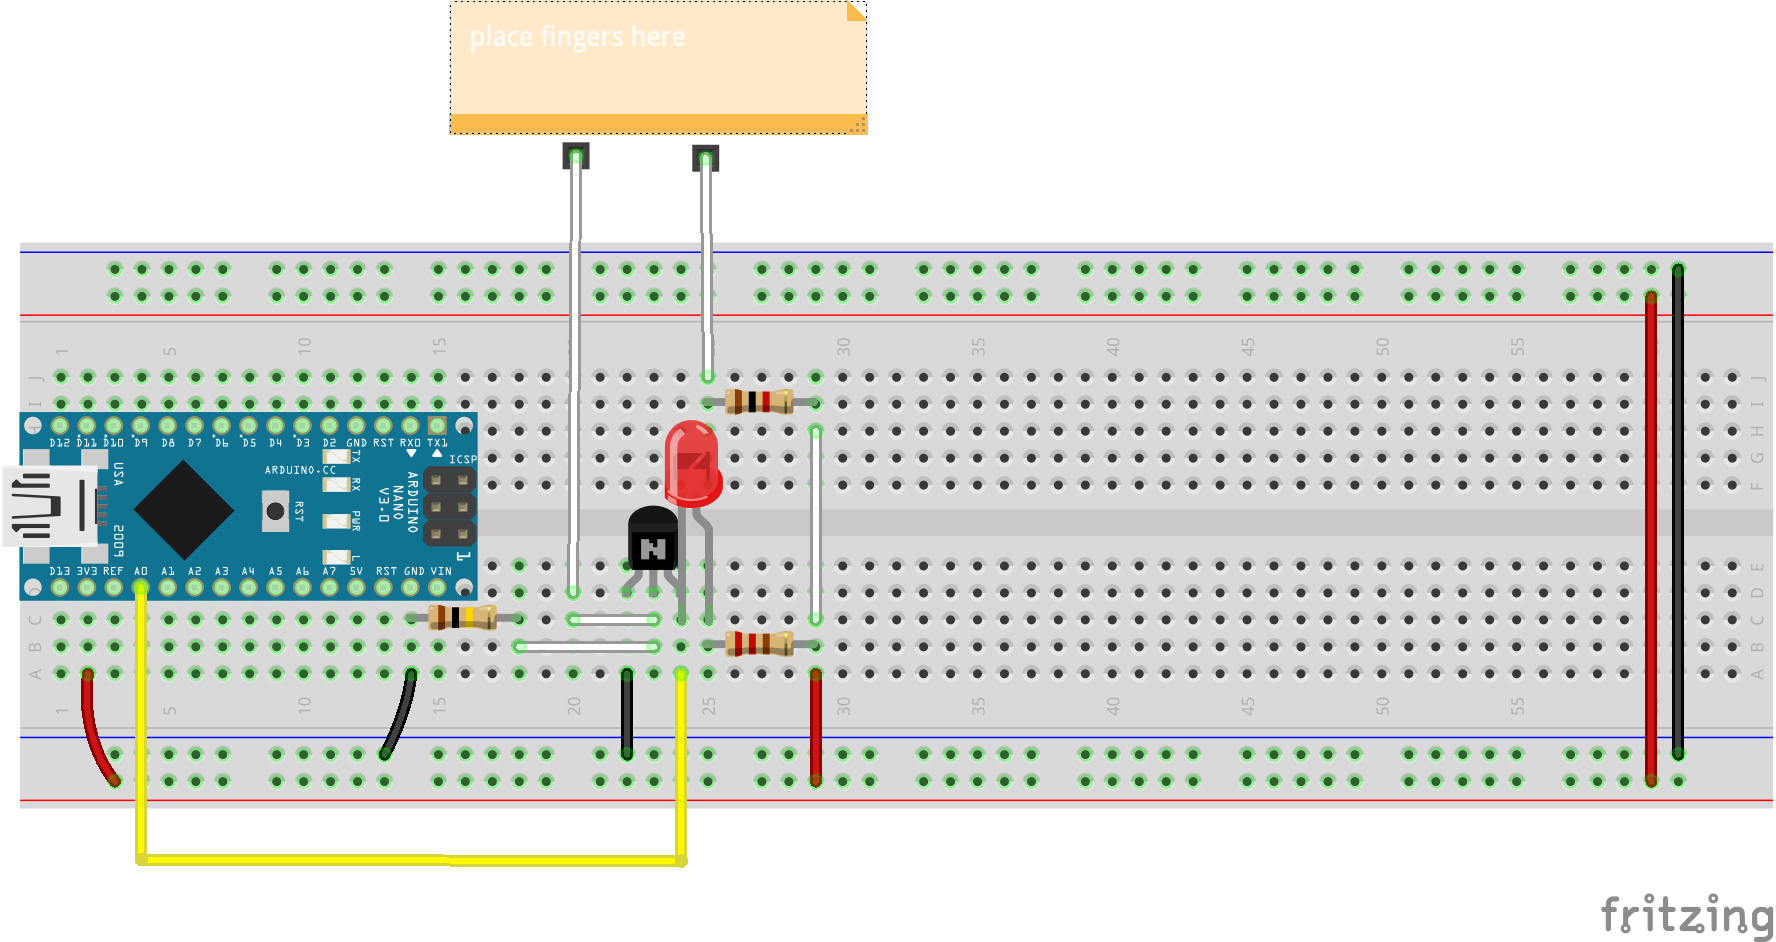
The circuit below uses a transistor to amplify the small amount of current running through your fingers to change the brightness of an LED. Try moving your fingers around and varying the amount of pressure you apply to the electrodes. Does the brightness of the LED change? Why or why not?
To get an analog voltage reading, connect a wire to A0 as shown and upload the code from File>>Examples>>Basics>>AnalogReadSerial. What happens to the readings when you add/remove your fingers. Why do you think that is?
Resistive touch sensors are very popular for making electronic music interfaces. With resistive touch you can create interesting patterns by cutting pieces of copper foil or using conductive ink. Unlike with capacitive touch, it’s actually better if the individual conductive pieces do not make contact, that way you can get interesting variety when you run your fingers over the patterns (as you are essentially changing the resistance of the circuit based upon how much of your body makes contact with the copper patterns and how much pressure you exert).
![resistive touch pattern [1]](https://physicalcomputing.ccastellanos.com/wp-content/uploads/2020/08/maxresdefault-300x169.jpg)
![resistive touch pattern [2]](https://physicalcomputing.ccastellanos.com/wp-content/uploads/2020/08/StereoField-300x197.jpg)
![resistive touch pattern [3]](https://physicalcomputing.ccastellanos.com/wp-content/uploads/2020/08/rene-300x223.jpg)
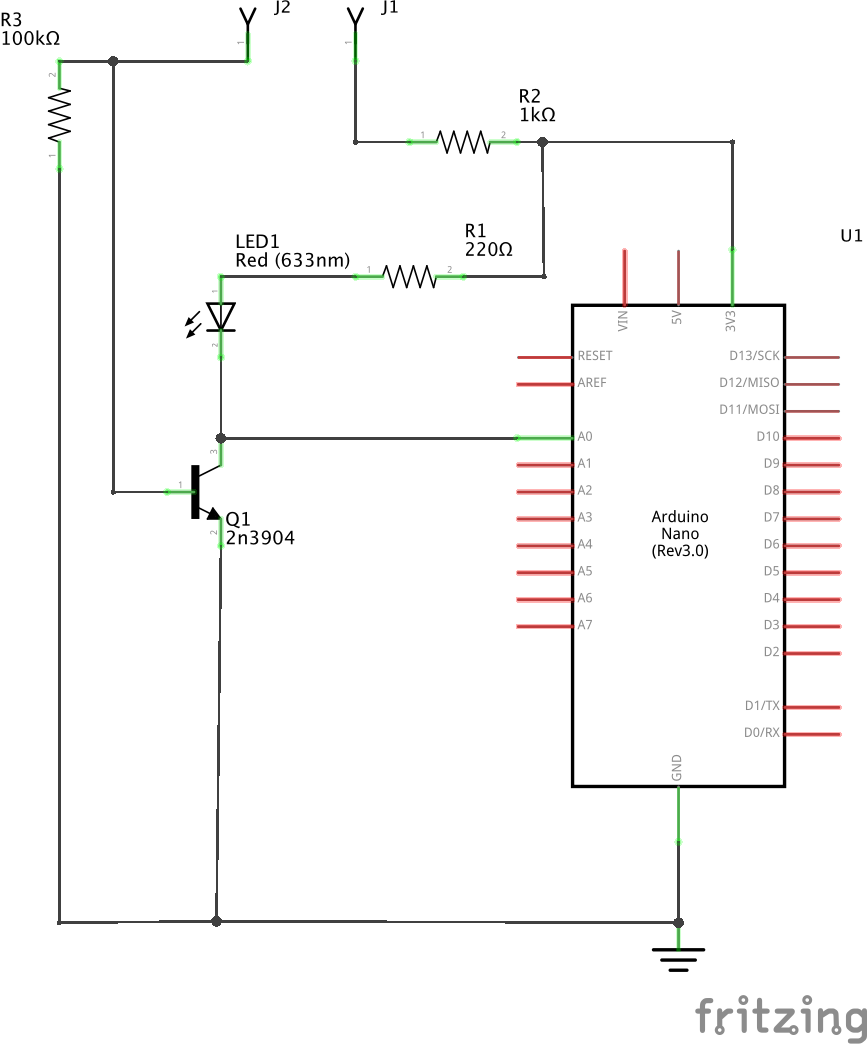
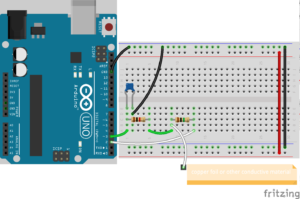
Below is another simple circuit you can build that uses resistive touch. Try to build these, experimenting with different pattens for the sensors. (You can use the AnalogReadSerial example code in the Arduino IDE)

Resistive touch sensor. The potentiometer is used to adjust sensitivity 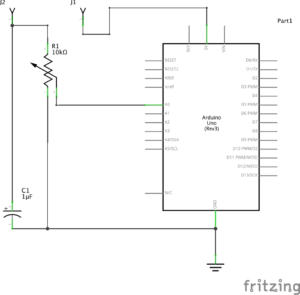
Resistive touch sensor. The potentiometer is used to adjust sensitivity
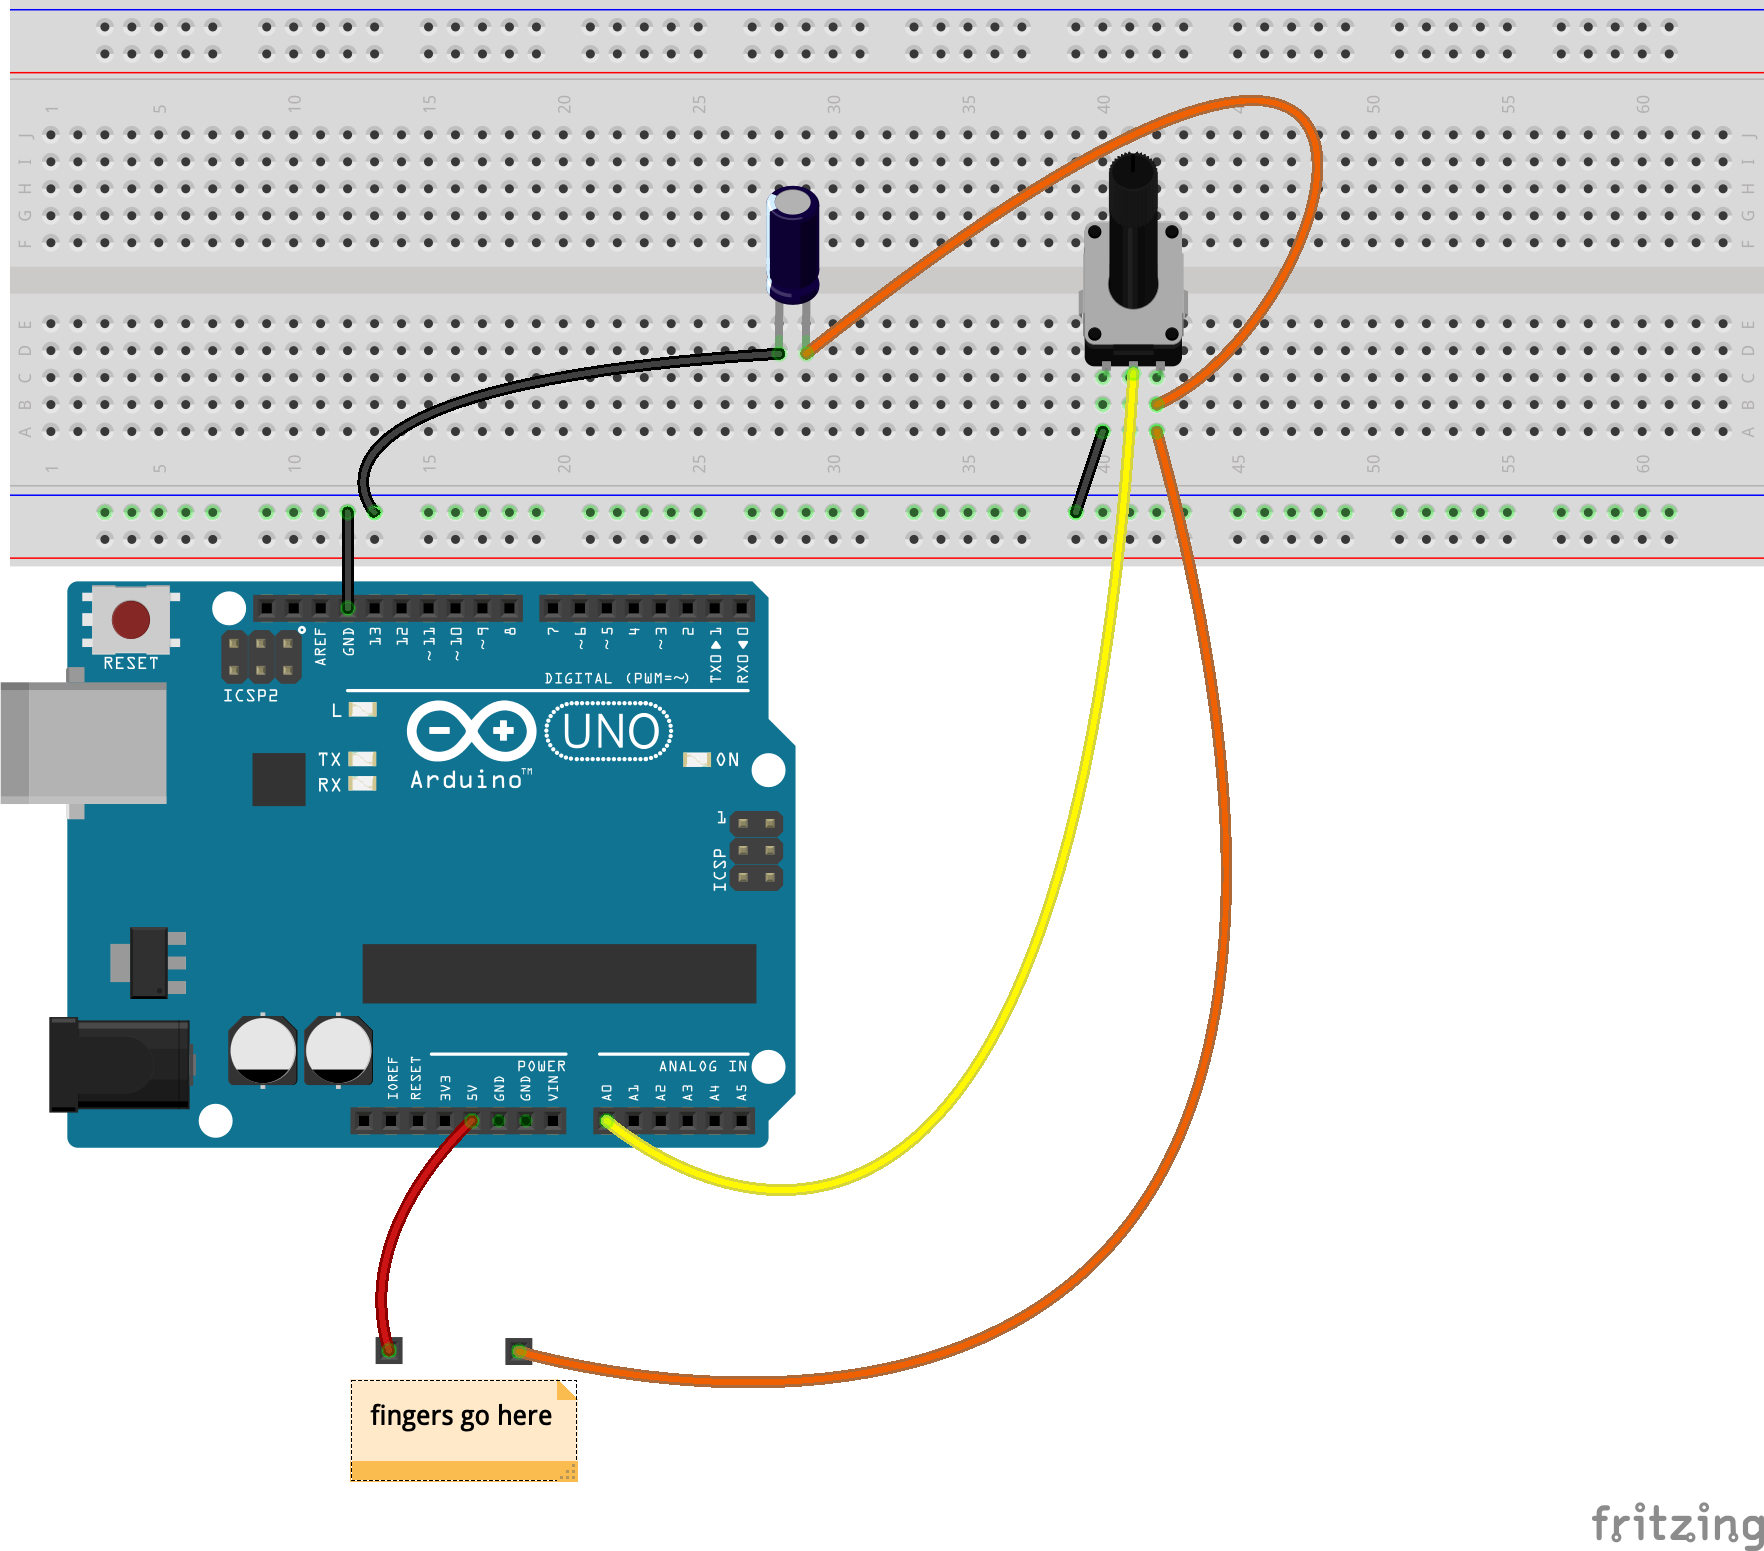
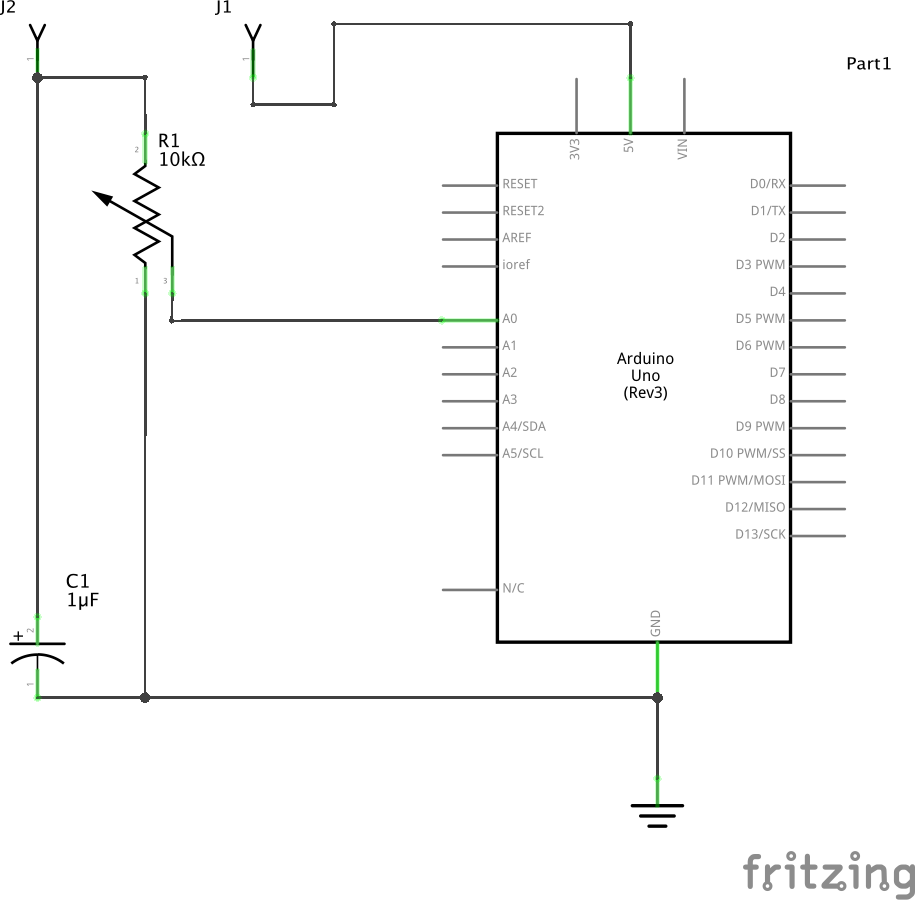
All schematics and breadboard layout files can be found here
Capacitive Touch
A capacitive sensor is a device that uses the change in capacitance (the ability to store electrical charge) to sense touch, proximity or the presence of bulk material or fluids. Whereas resistive touch is based on the skin’s electrical resistance, here the body’s ability to store electrical charge (essentially acting as an antenna) is used. The way it works is that it is essentially creating a capacitor between your body and the conductive material (e.g. copper foil).
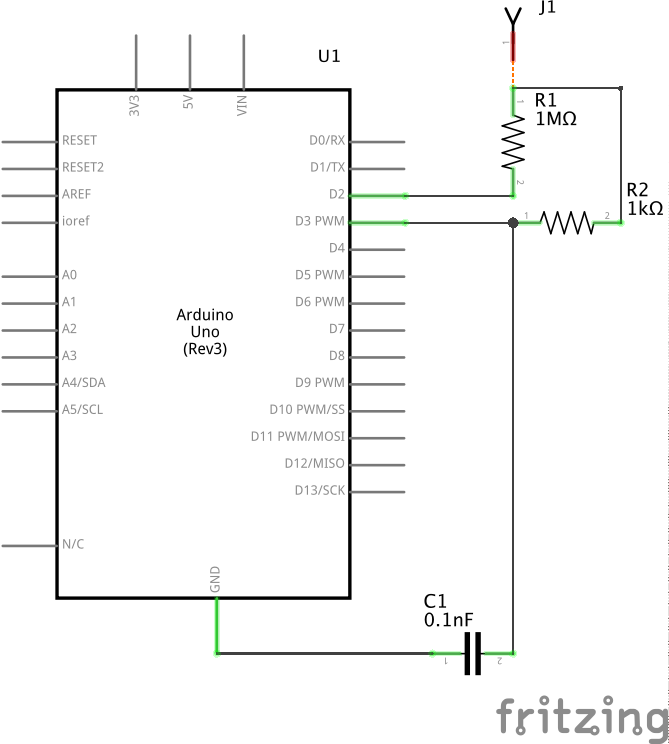
Build the circuit below.
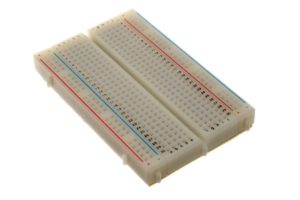
It should look something like this:
![capacitive sensor breadboard photo [1]](https://physicalcomputing.ccastellanos.com/wp-content/uploads/2020/08/capsense01.jpg)
![capacitive sensor breadboard photo [2]](https://physicalcomputing.ccastellanos.com/wp-content/uploads/2020/08/capsense02.jpg)
Your “sensor” is the piece of copper foil (or whatever conductive material you are using). The 1MΩ resistor is on the right (in red). The 1KΩ resistor is there to protect the receive pin from voltage spikes. The small (0.1nF) capacitor is not absolutely necessary but it helps to stabilize the readings. (The microcontroller is an Arduino Mega 2560 but the pin numbers used are the same as the diagrams above).
The Arduino code makes use of the Capacitive Sensor library. You can search for it and install it via the Arduino Library Manager (Sketch > Include Library > Manage Libraries…).
#include <CapacitiveSensor.h>

// 50k - 50M resistor between pins 2 & 3, pin 3 is sensor (receive) pin
CapacitiveSensor sensor = CapacitiveSensor(2,3);

void setup() {
  // turn off autocalibrate on channel 1 - just as an example
  sensor.set_CS_AutocaL_Millis(0xFFFFFFFF);
  Serial.begin(9600);
}

void loop() {
  long total = sensor.capacitiveSensor(30); // take 30 samples

  Serial.println(total);                    // print sensor output
  delay(1);                                 // small delay to spare serial port from too much data
}
Notes:
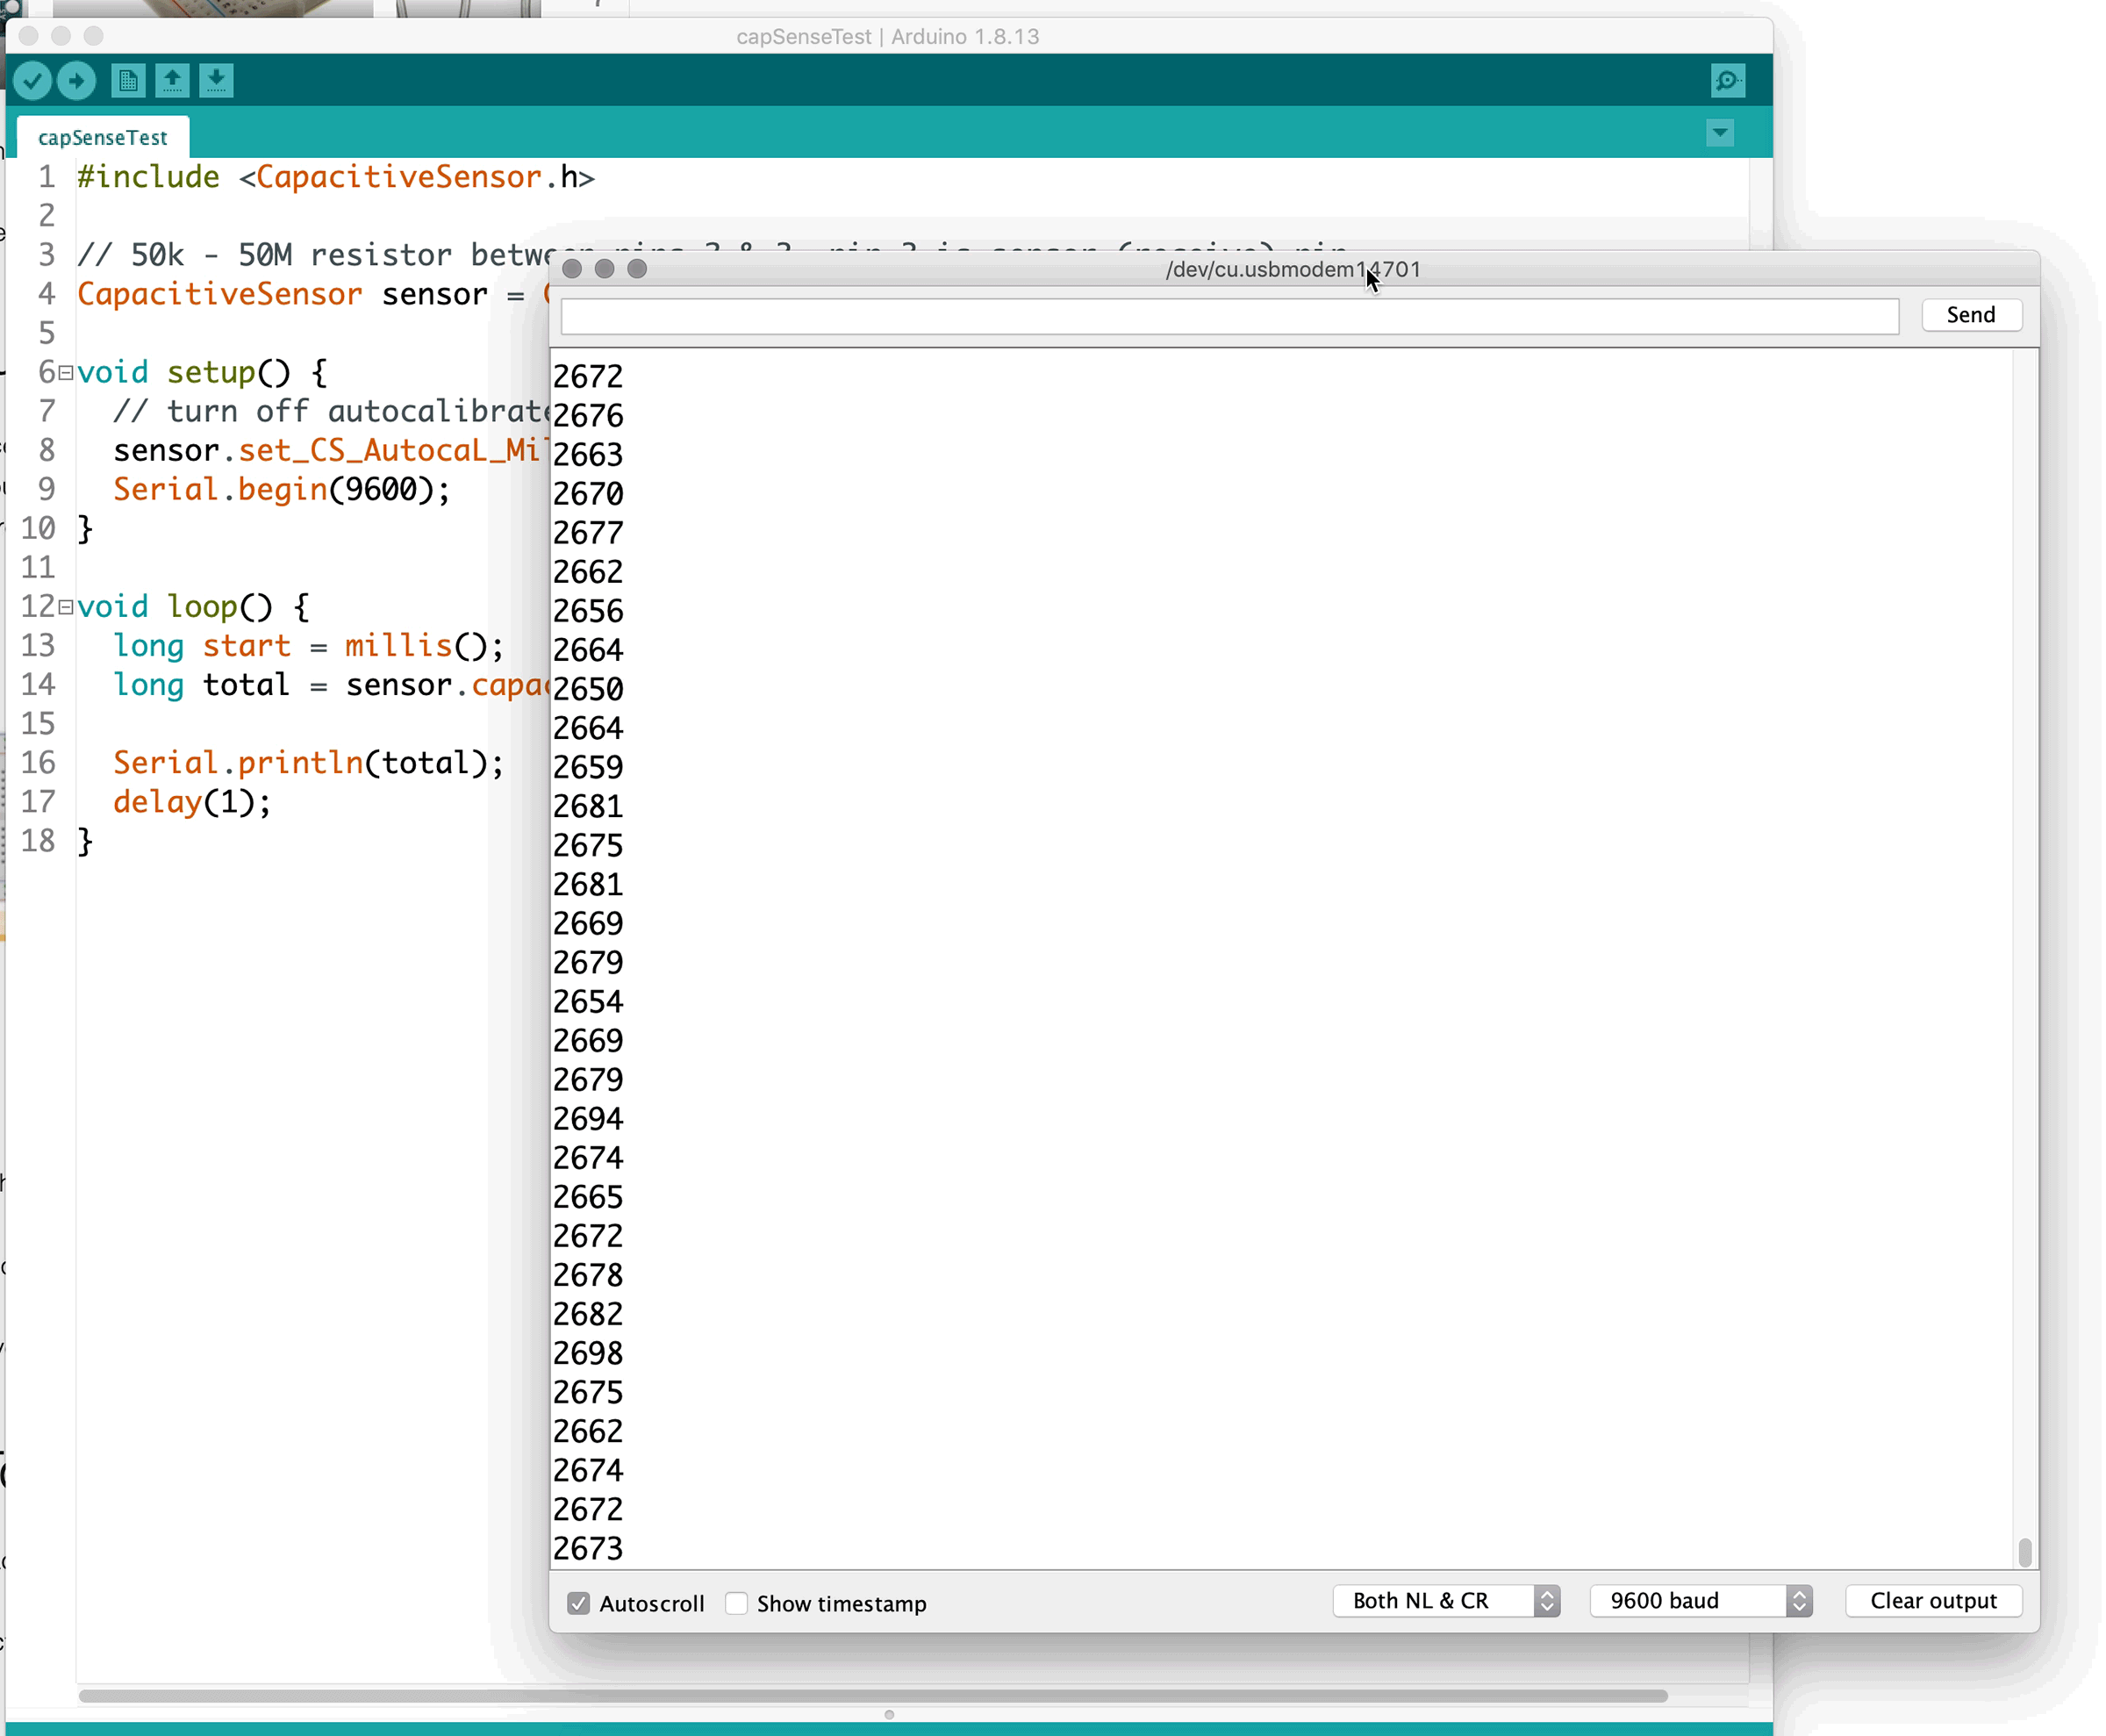
As you can see from the screenshots below the numbers printed in the Serial Monitor are low and somewhat erratic when there is no one near the foil (first screenshot). As you put your finger close to the foil (< 1 inch) the numbers start to go up (2nd screenshot). Finally, when the foil is touched the numbers shoot up dramatically (third screenshot). To use this set up as a switch, simply set a threshold (say 1000) and look for readings above and below that threshold.
What is happening here is the Arduino measures how much time the capacitor (i.e the touch sensor) takes to charge, giving it an estimate of the capacitance. This is actually a complicated process involving low level timers and memory registers. The CapacitiveSensor library abstracts away most of this process for us. When the send pin changes state, it will eventually change the state of the receive pin, but there is a small delay caused by our “capacitor” (the foil and your body) charging up. This delay is determined by what is called the RC (resistor-capacitor) time constant.
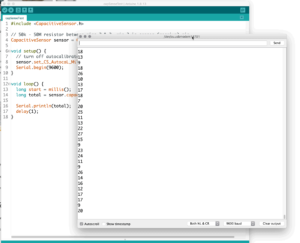
No one near the sensor 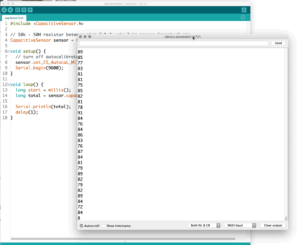
Finger < 1inch from sensor 
Finger touching sensor


Some guidelines:
The send pin must connect with a large-value resistor, between 100K to 50M. Larger values allow more sensitivity, but with slower response.
Use a 100k-1M resistor for absolute touch to activate. If you would like the sensor to respond from further away (i.e. a proximity/distance sensor), you will need larger resistors. Increasing the surface area of your conductive material will also help.
- A10 megohm resistor the sensor will start to respond 4-6 inches away.
- A 40 megohm resistor the sensor will start to respond 12-24 inches away (dependent on the size of your conductive material).
For many applications, an insulating layer, such as paper or plastic is a little safer. It will reduce the sensitivity of the sensor a bit but it does have the added benefit of allowing you to hide your sensor (under the paper for example).
Your Arduino should be connected to earth ground (i.e. plugged into a wall socket directly or a computer connected to a wall socket, not running on batteries) for best results.
All of the files for our capacitive sensor are located here in the GitHub repo for the course.
Other Ways to Sense Touch
You are not limited to the methods above for touch sensing. In fact, if you have a graphite pencil handy, you can essentially draw your sensor with the pencil as well. Just make sure the drawing is continuous (no breaks in between). A force-sensing resistor (FSR), is another touch based sensor that is easy to use. It uses a conductive polymer material whose resistance changes when a force, pressure or mechanical stress is applied. It is just a variable resistor and the same voltage divider circuit you used for the photocell will work for an FSR.
Off the Shelf Touch Sensors & Conductive Materials
- MPR121 12-channel Capacitive Touch Sensor Breakout
- Force Sensing Resistor
- Pressure-sensitive Conductive Sheet (Velostat/Linqstat)
- Conductive paint
- Conductive fabric
Discussion
Our tactile senses contain an extraordinary amount of information. We rely on tactile feedback for all kinds of mundane and skilled tasks alike. In addition, touch denotes a certain level of intimacy and familiarity (we typically do not go around touching strangers). It has all kinds of layers and nuance (caressing, petting, tapping, etc) that convey all sorts of meanings. Touch’s multi-sensory nature also seems to have a unique connection to our abilities to explore our surroundings and develop a sense of bodily awareness. Capturing all of this information via sensors and digital computation is no small task. However, given the extraordinary potential of touch, it is a worth asking why it is not utilized more in computational interfaces.
Consider this when you design your interfaces. How will different kinds of tactile actions, movements and gestures affect the experience of your interface, especially when coupled with the responsiveness of the system. What does one kind of touch afford or not afford (e.g. a hammer affords grasping and hammering, while a soft malleable surface may afford caressing)?
Further Reading
Capacitive Sensing Tutorial on Arduino Playground
Drawdio: A Pencil That Lets You Draw Music
A Simple Pressure Sensitive Touch-pad
Soma Lyra-8 Touch-based Drone Synth
Playing With Food (exploring the capacitive properties of food)
TouchLib (touch sensing library for Arduino)