Introduction
Adding networking capabilities to alternative physical interfaces adds both possibilities and challenges to their design and construction. This is often referred to as the “Internet of Things” (IoT) — making physical objects network-capable. Physical computing includes many techniques for making devices that respond to a wide range of embodied human actions. This lab activity shows you how to augment those capabilities by offering a brief introduction into making interfaces that talk to one other over a wireless network connection.
What You Will Need to Know
To get the most out of this lab, you should be familiar with the following concepts beforehand. If you’re not, review the links below:
Items You Will Need
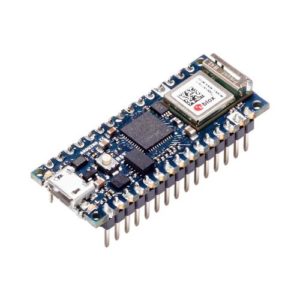
Wifi-enabled Arduino (e.g. Arduino Nano 33 IOT) (x2) 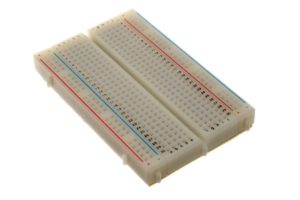
Breadboard 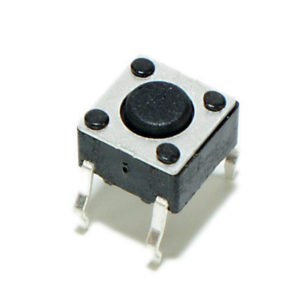
Momentary pushbutton switch 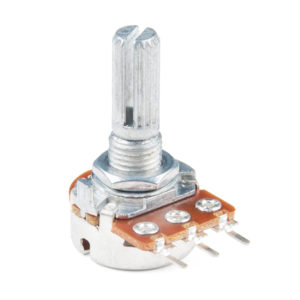
Potentiometer (x2) 
LEDs (x2) 
Resistors (220ohm – 1Kohm, 10kohm) (x2)
Using the Arduino Nano 33 IOT as a web server
WiFi and Bluetooth connectivity are available on the Nano 33 IoT via a low-power 2.4GHz radio. The WiFiNINA library supports the WiFi on this board (make sure you have this library is installed). Before you begin, you may want to connect a sensor or two to your analog inputs. To use the Nano 33 IOT as a web server, take the following steps:
Steps and observations:
- Open the sketch File>Examples>WiFiNINA>WifiWebServer
- Select the “arduino_secrets.h” tab and enter the SSID and password for your wifi network
- Upload the sketch to your board.
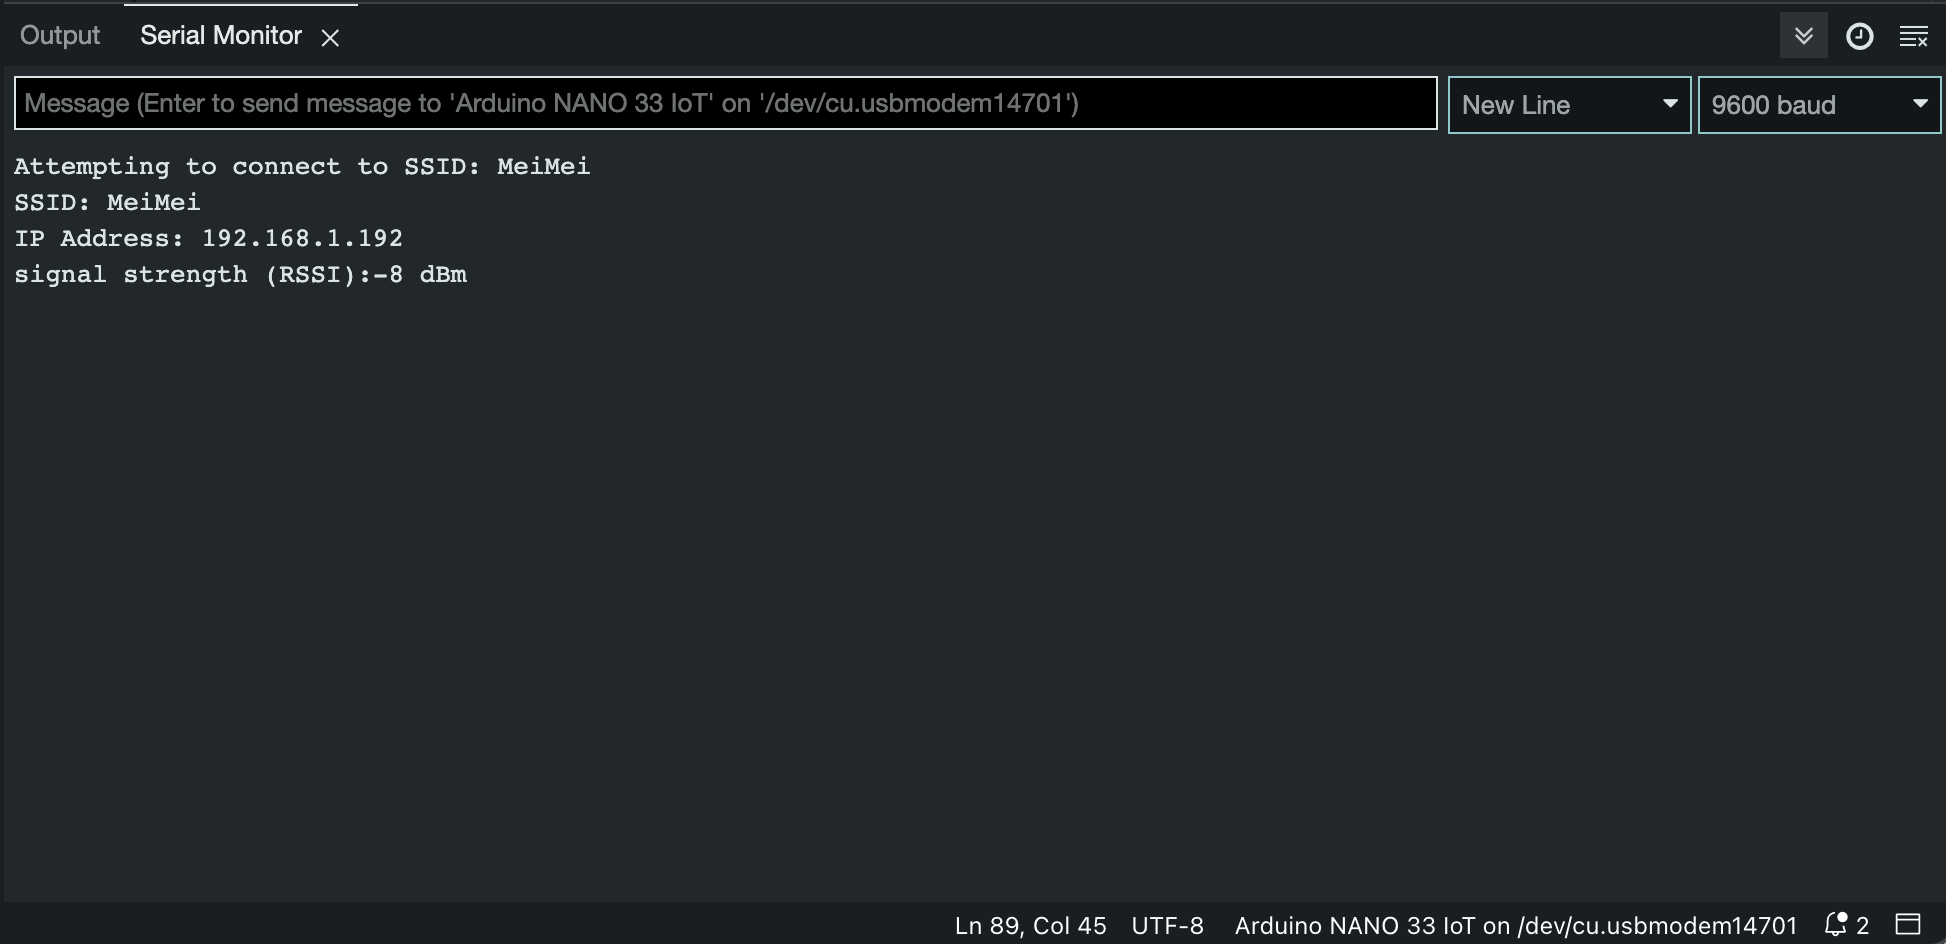
- Open the Serial Monitor on the Arduino IDE and confirm that the Arduino connects to the wifi network (this may take several seconds).
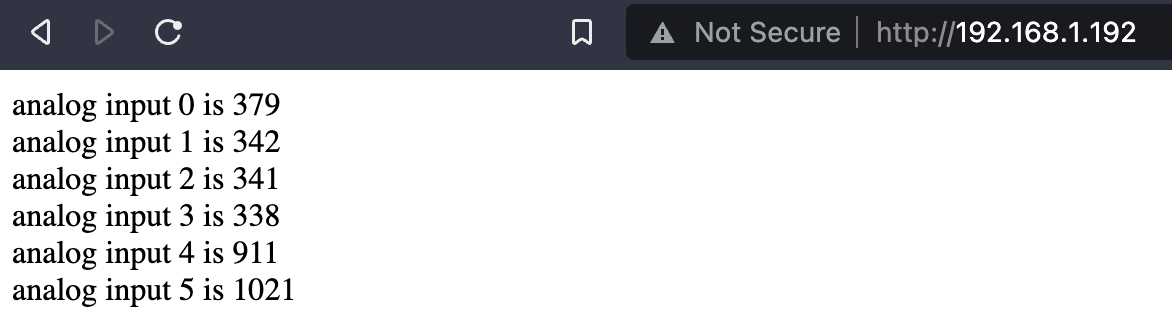
- Once it connects it will show your IP address. Copy and paste that onto a browser window and you should see your analog input readings on the page.
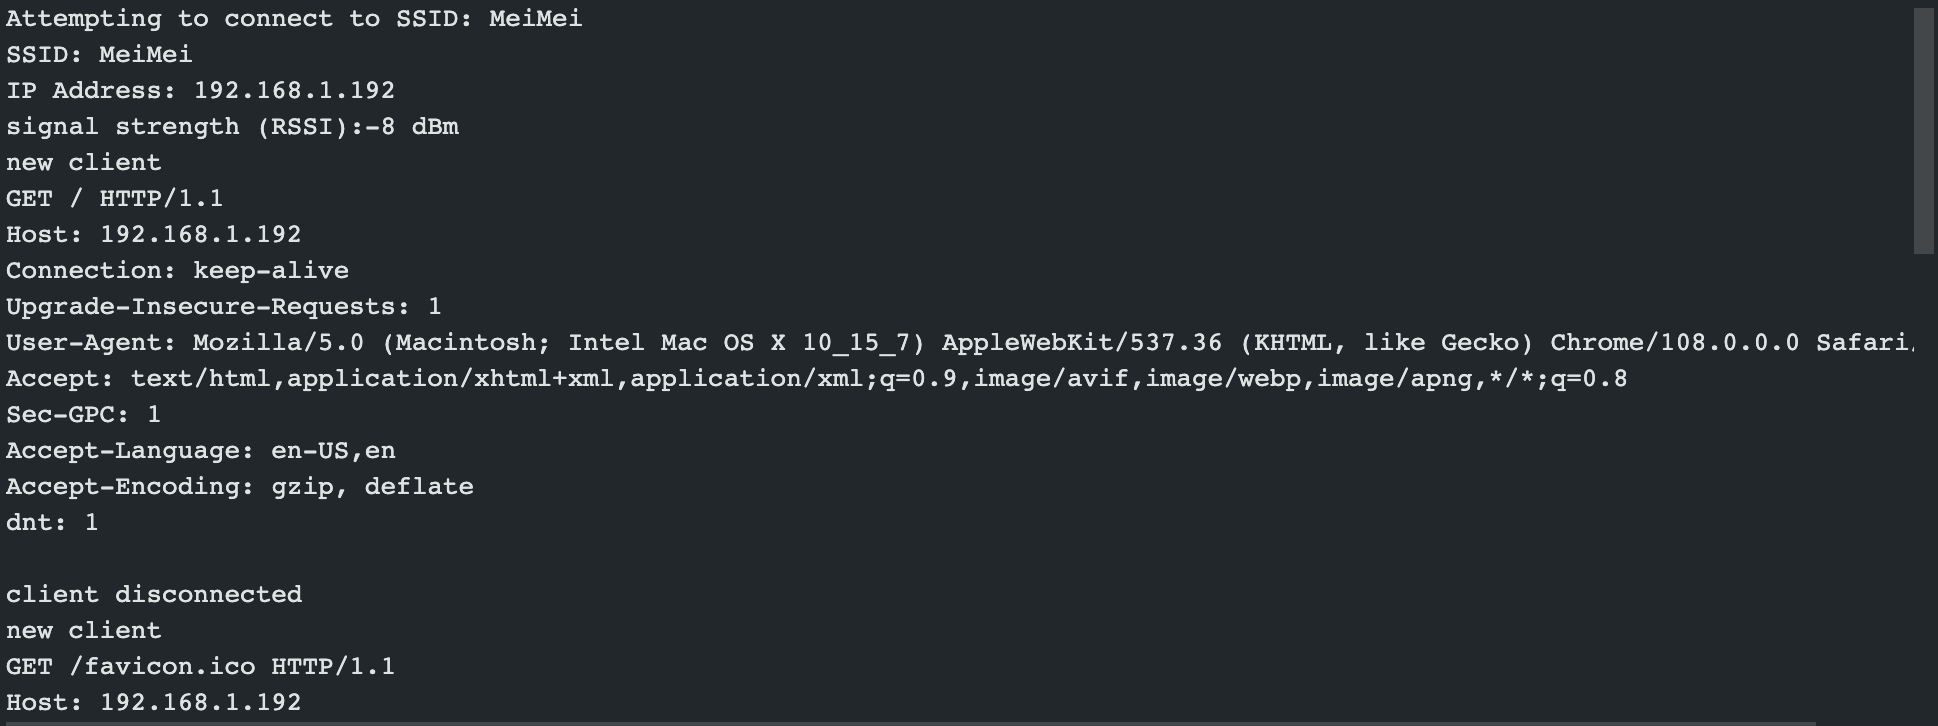
- Observe the serial monitor for HTTP responses from the board.
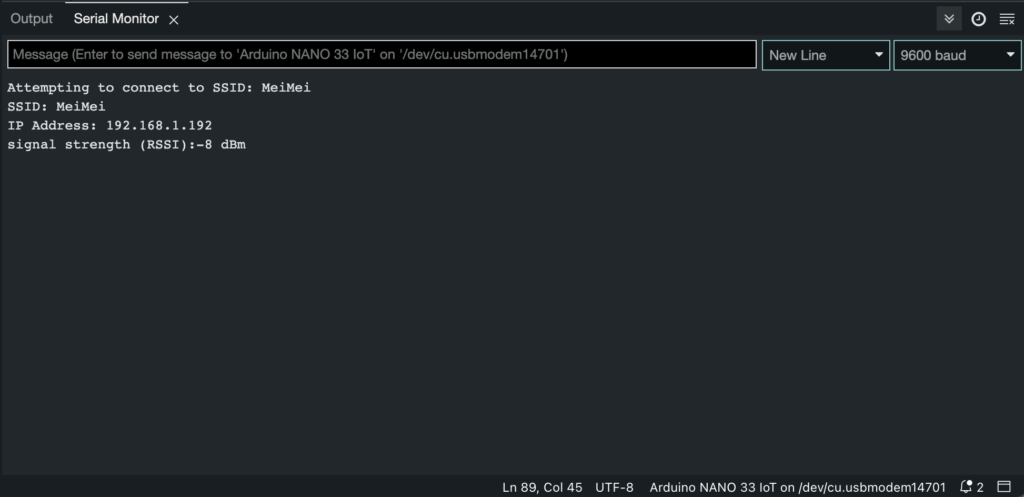
Serial Monitor – Arduino board connects to a wifi network 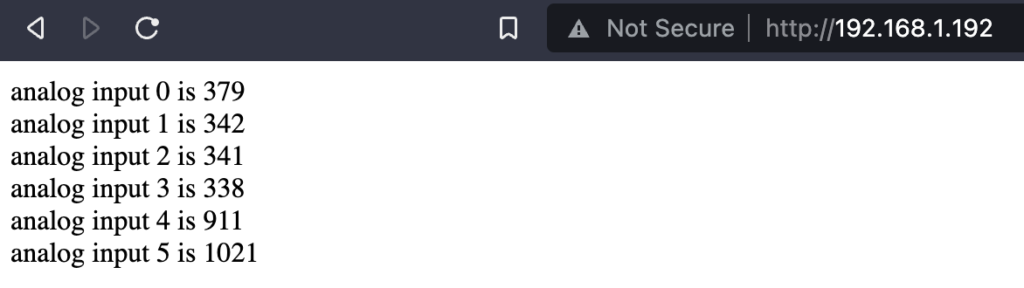
Arduino analog input readings in a browser 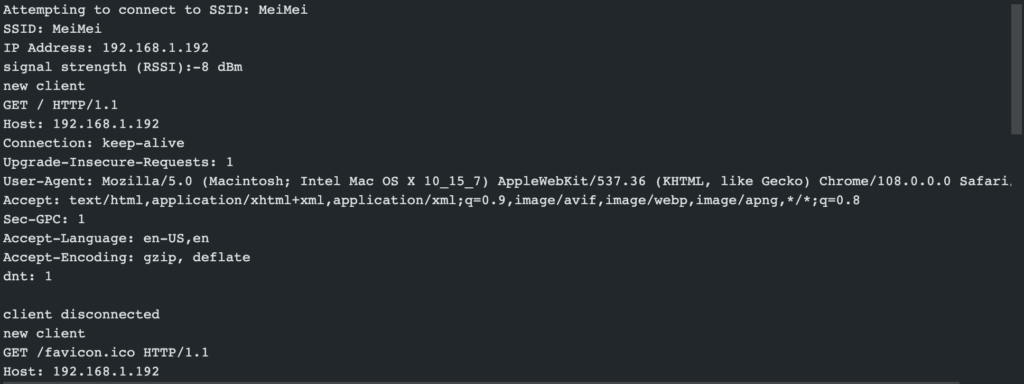
Serial Monitor – Arduino board HTTP responses
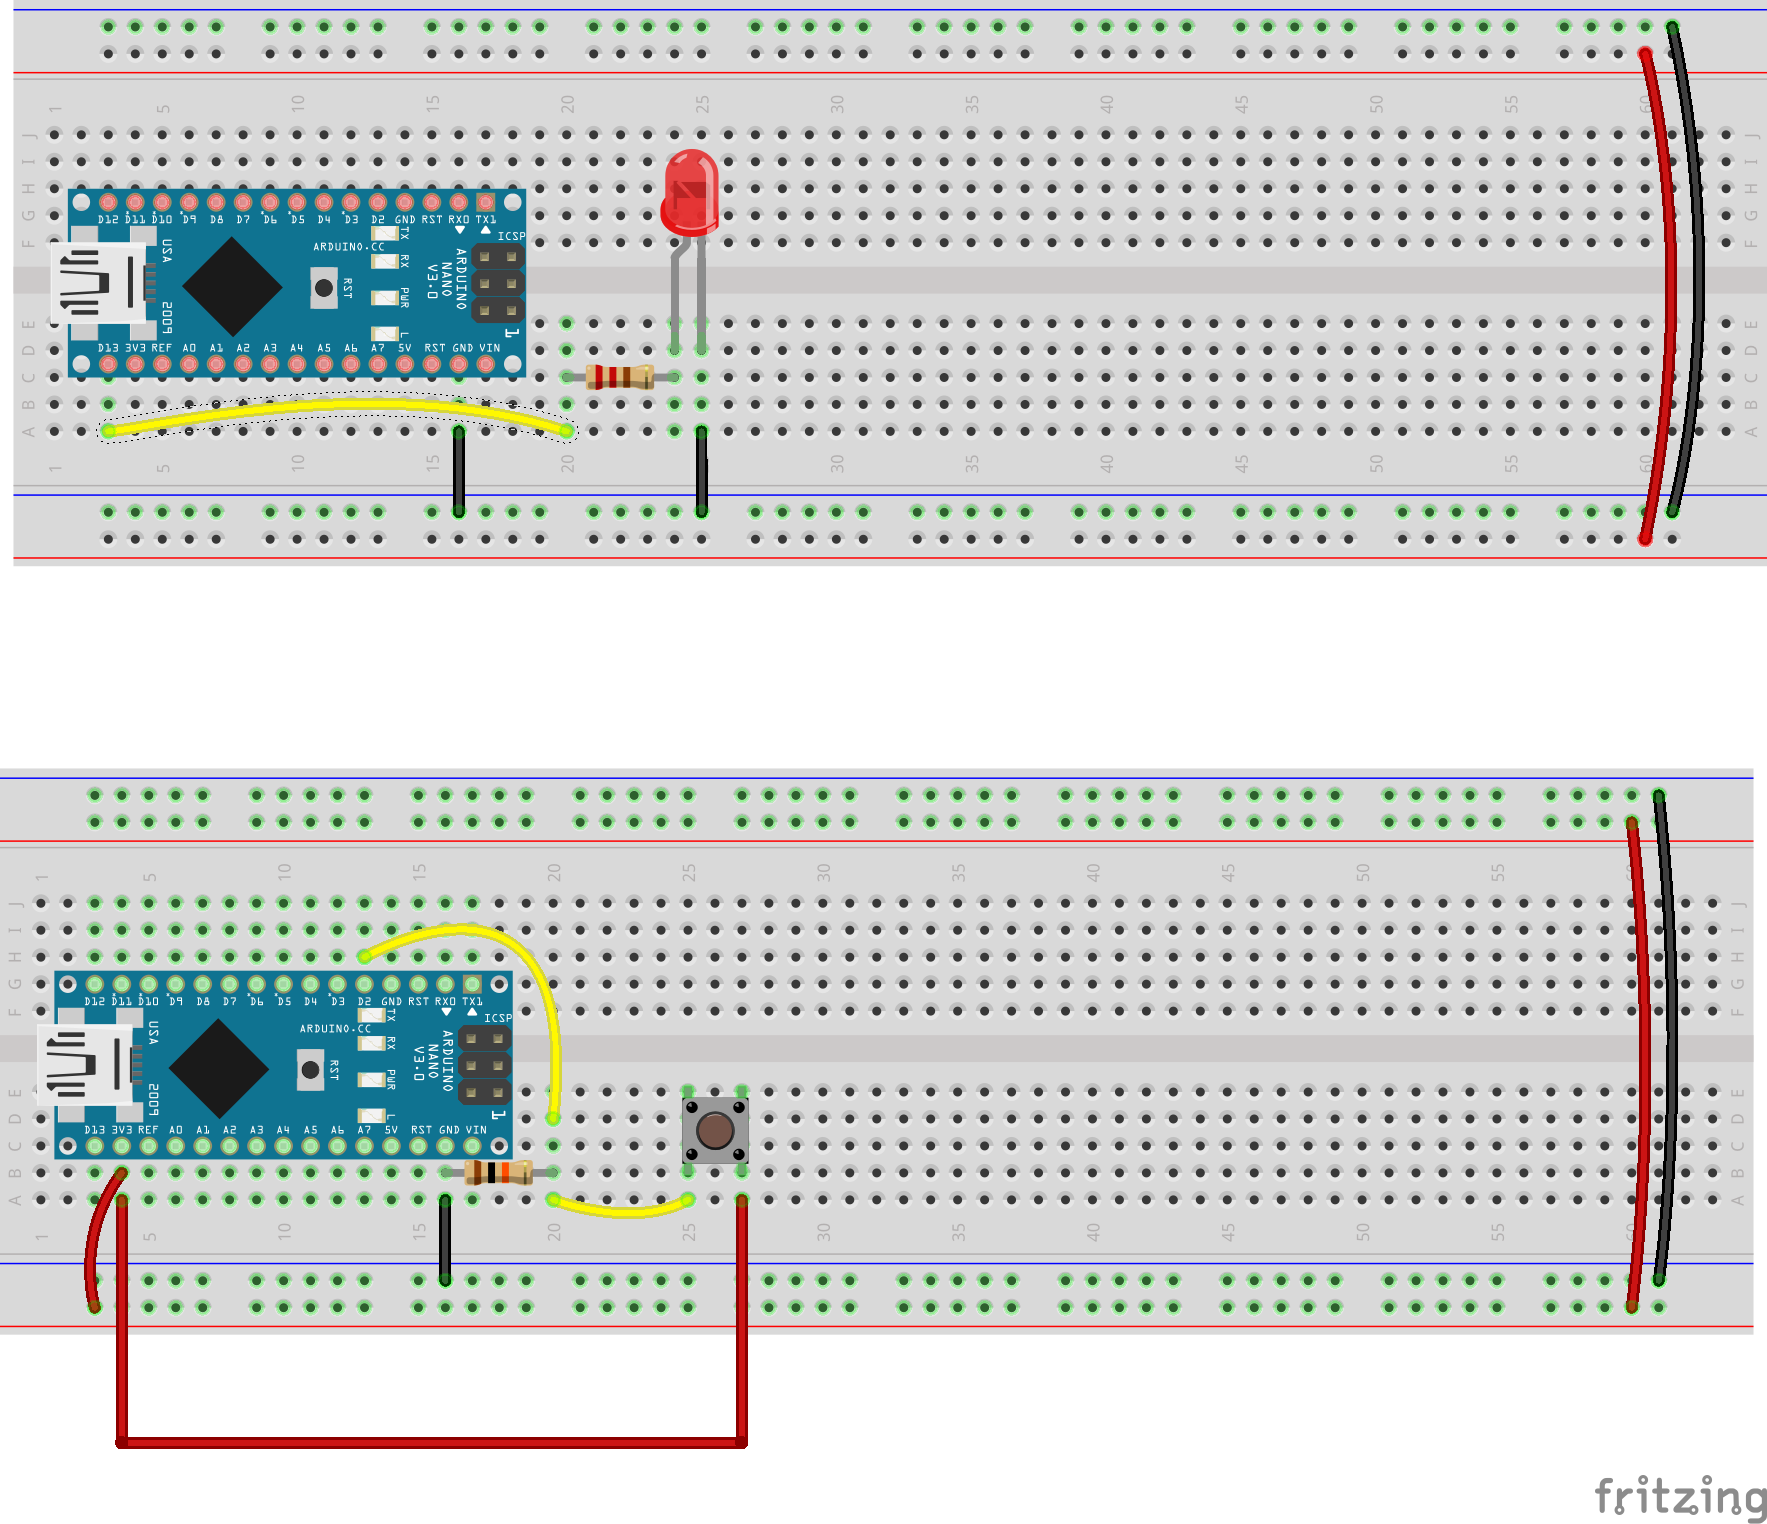
Two Arduinos Talking to Each Other Over Bluetooth
Along with WiFi, Bluetooth connectivity allows the Arduino Nano 33 IoT to be used in a number of projects that the original Nano (or the Uno) cannot. The Nano 33 IoT supports Bluetooth 5 Low Energy (BLE) and can act as either a Bluetooth controller (called a “Central”) or peripheral (called a… “Peripheral”), meaning it can be used as either a controlled device or as a controller itself. Here, we will have one Nano 33 IoT controlling an LED connected to another Nano 33 IoT.
Steps and observations:
- Build the circuit below. (You may want to assemble these circuits on two independent breadboards, as shown below.)
- Install the ArduinoBLE library if you have not already done so (Sketch > Include Library > Manage Libraries…, search for “ArduinoBLE”)
- The ArduinoBLE examples are located in File > Examples > ArduinoBLE. They are divided into two folders, one for the Central controller and the other for the Peripheral device. From the Central folder select “LEDControl”. From the Peripheral folder select “LED”.
- Upload the LEDControl sketch to the Arduino you want to use as the Central. and upload the LED sketch to the Arduino you want to use as the peripheral.
- Press the button on the Central Arduino and the LED on the Peripheral should light up.
Notes:
The key element to note in each sketch is that they use a long, common string to identify the peripheral and establish a match. This is a universally unique identifier (UUID) string. To avoid confusion (with so many BLE-capable Arduinos running in class simultaneously), you may want to generate your own UUID’s. I suggest heading over to https://www.uuidgenerator.net/ and generating new UUIDs for each peripheral you are using.
The peripheral establishes an “advertised service” with a “characteristic”, which in this case is the LED. The central controller looks for this advertised service once it establishes a connection.
The “characteristic” is the state of the LED (on or off).
If the peripheral has an LED characteristic then the central sketch knows that it can control it. It reads the state of the pushbutton and modifies the characteristic. The Peripheral receives the modified characteristic and sets the LED state accordingly.
This is a very simple example, but it can be extended in many ways (e.g. try adapting some of the circuits and code from Homework 3 to create a location-based interface or a “smart space” by having different states be triggered from different locations in a room).
Two Arduinos Talking to Each Other Over the Internet
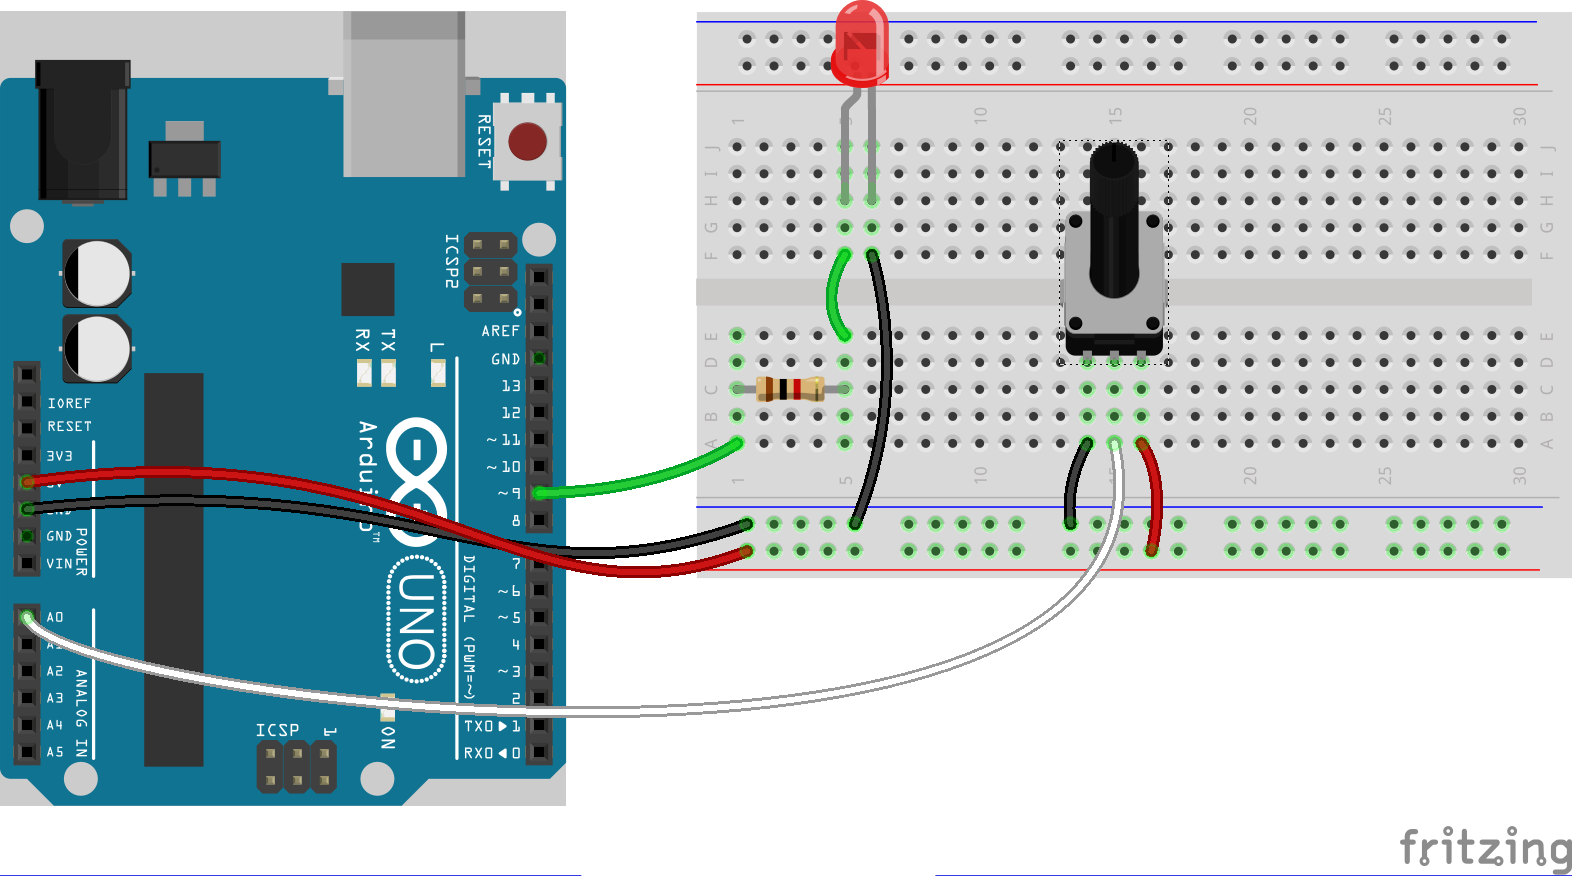
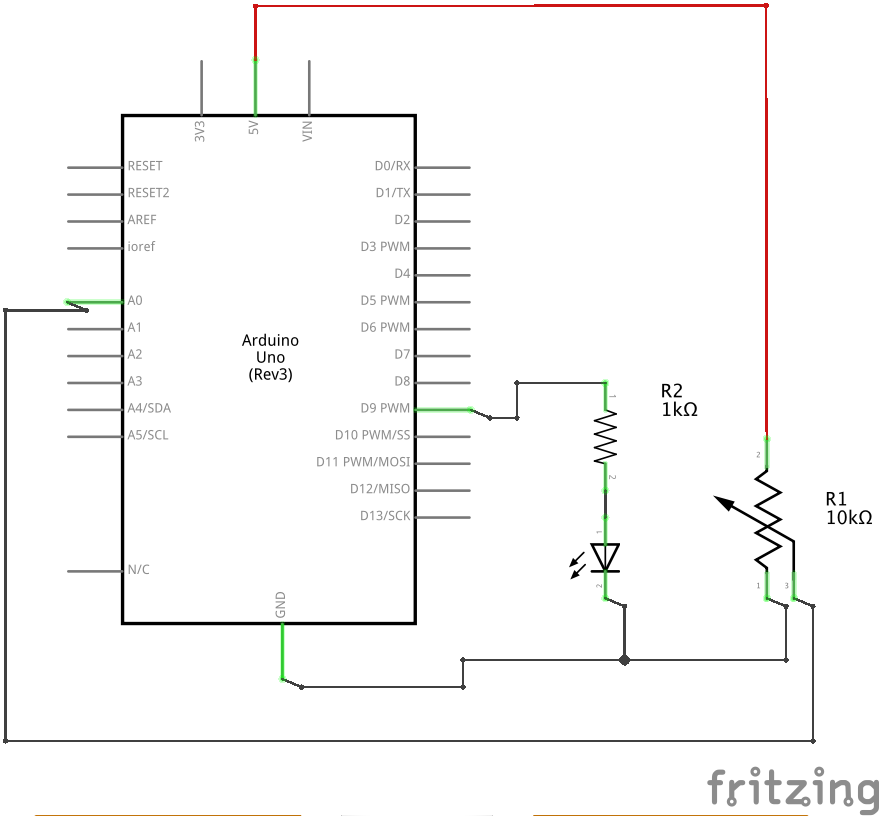
This example shows you how to take sensor data from one network-enabled Arduino microcontroller and send it to another. Based on the Fade example in the Arduino IDE, you will use an analog sensor or potentiometer to control blink rate of an LED on another remote Arduino via a wifi connection. The remote Arduino will do the same. This lab activity is best done in pairs and ideally each Arduino will be connected to a different wifi network. We will be using the Arduino WiFiNINA library, which works with the Arduino Uno Wifi Rev 2, Arduino Nano 33 IOT and other wifi-capable Arduinos.
Connect a Potentiometer and LED
Use a potentiometer (or other analog sensor) to control the blink rate of an LED.
Steps and observations:
- Build the circuit below (twice).
- Install the WiFiNINA library if you have not already done so (Sketch > Include Library > Manage Libraries…, search for “WifiNINA”)
- Upload the code below to both Arduinos (make sure to change the ssid and pass variables to those of the wifi networks you are connecting to.
- Take turns turning the potentiometer and observing the remote LED change brightness
- Experiment with other sensors and/or actuators.
/*
 * Fade_WifiServer
 *
 * Example of using an Arduino wifi to trade sensor readings with another Arduino
 *
 * Carlos Castellanos
 * August 17, 2020
 *
 * -----------------------------------------------------------------------------------
 *
 * Things that you need:
 * - (2) wifi-enabled Arduinos (e.g. Arduino Uno Wifi Rev 2)
 * - (2) analog sensors or potentiometer
 *
 * The Arduinos run as servers and reecive the sensor data from a client (the other Arduino)
 * They then use one another's sensor data to change the brightness of the LED using PWM
 *
 */

#include <SPI.h>
#include <WiFiNINA.h>

#include "arduino_secrets.h"
/*
 * please enter your sensitive data in the arduino_secrets.h file
 */
const char ssid[] = SECRET_SSID;     // wifi ssid
const char pass[] = SECRET_PASS;     // wifi password
const unsigned int keyIndex = 0;     // your network key Index number (needed only for WEP)

int status = WL_IDLE_STATUS;

WiFiServer server(2390);             // create a server on port 2390

String inString;                     // string to hold data from the client

boolean alreadyConnected = false;    // whether or not the client was connected previously

const unsigned int ledPin = 9;       // the PWM pin the LED is attached to
const unsigned int sensorPin = 0;    // analog pin 0

void setup() {
  pinMode(ledPin, OUTPUT);
  Serial.begin(9600);

  // check the status of the wifi module
  if(WiFi.status() == WL_NO_MODULE) {
    Serial.println(F("Communication with WiFi module failed!"));
    // don't continue
    while (true);
  }

  String fv = WiFi.firmwareVersion();
  if(fv < WIFI_FIRMWARE_LATEST_VERSION) {
    Serial.println(F("Please upgrade the firmware"));
  }

  // attempt to connect to the wifi network
  while(status != WL_CONNECTED) {
    Serial.print(F("Attempting to connect to Network named: "));
    Serial.println(ssid);
    // Connect to WPA/WPA2 network.
    // If using a WEP network use WiFi.begin(ssid, keyIndex, key);
    // If using an open network use WiFi.begin(ssid);
    status = WiFi.begin(ssid, pass);
    // wait 10 seconds for connection
    delay(10000);
  }

  Serial.println(F("Connected to wifi"));
  Serial.print(F("SSID: "));
  Serial.println(WiFi.SSID()); // the SSID of the network you're connected to
  IPAddress ip = WiFi.localIP(); // this board's IP address
  Serial.print(F("IP Address: "));
  Serial.println(ip);

  // start the server
  Serial.println(F("\nStarting server..."));
  server.begin();
}

void loop() {
  // wait for a new client
  WiFiClient client = server.available();

  // when the client sends data, reply with data from the server
  if(client) {
    if(!alreadyConnected) {
      // clean out the input buffer
      client.flush();
      Serial.println(F("We have a new client"));
      alreadyConnected = true;
    }

    while(client.available() > 0) {
      // read the incoming bytes from the client
      char inChar = client.read();
      if(inChar != 10) { // look for a new line ('\n' or ASCII 10)
        inString += inChar;
      }

      // convert value to an integer and map to a value between 0 and 255 (the range of analogOut())
      int pwmVal = map(inString.toInt(), 0, 1023, 0, 255);
      analogWrite(ledPin, pwmVal); // this will change the brightness of the LED
      Serial.print(F("From client: "));
      Serial.println(pwmVal);

      // read the analog sensor value and send to client
      int outVal = analogRead(sensorPin);
      server.println(outVal);
      Serial.print(F("To client: "));
      Serial.println(outVal);

      delay(5); // slight delay to keep things stable
    }
  }
}
// arduino_secrets.h
#define SECRET_SSID ""
#define SECRET_PASS ""
Code also available here.
Notes:
If you would like to share your sensor data over the Internet, the best method is to use a cloud-based IoT service such as Adafruit IO, ThingSpeak and Arduino Cloud Platform. These services feature an API that you can use to register your sensor data and make it available for anyone to access via JSON, XML or other formats. Some have client libraries for popular languages/platforms and even feature charting and analytics as part of their free tier.
Discussion
One of the greatest appeals of networks, the Internet and telecommunications in general is the ability to transcend the ancient barrier of time and space. Adding network capability to physical interfaces allows one to explore different modalities of perception. Touch, movement, place, and many other forms of perceptual experience can be extended and reimagined. An everyday object like a couch for example, can exist — in some sense — in two (or more) places at once, allowing participants to virtually sit together, exchanging information, sensations, emotions. The same goes for sculptures, buildings, bodies and more. The whole relationship between physical space and networked/virtual space is a vast, complex and still somewhat under-explored area.
Consider all the themes that might be explored through physical computing and then consider how they may be altered or extended with networking and telepresence. What new experiences, issues and possibilities arise?
Further Reading
Constraint City, Gordan Savicic
Autonomy Cube, Trevor Paglen
Alt-C, Michael Sedbon
Using Respiration to Mine Cryptocurrency, Max Dovey
Networked Emoticon Device, Mauricio Melo
CyberSM, Stahl Stenslie
Wikipedia article on Locative Media
Wikipedia article for Telepresence
Getting Started With Arduino Uno Wifi Rev2
Connecting the Nano 33 IOT to a WiFi network